
Setting up storefront exchange
PostCo’s Storefront Exchange lets customers return one item in exchange for multiple pieces, choosing directly from your website - making exchanges smooth, boosting order value, and encouraging customers to shop more.
How this works?
In the returns portal, customers will be redirected to your online store upon selecting an item to be exchanged
While in your online store, the customer can select multiple items to exchange from your full product catalogue
Once customers have completed their selection, they are redirected back to the returns portal to review and submit their return
Note: Activating Storefront Exchange will automatically enable refund exchange balance and higher value exchange.
Here's how it looks like to customers
Setting up Storefront Exchange
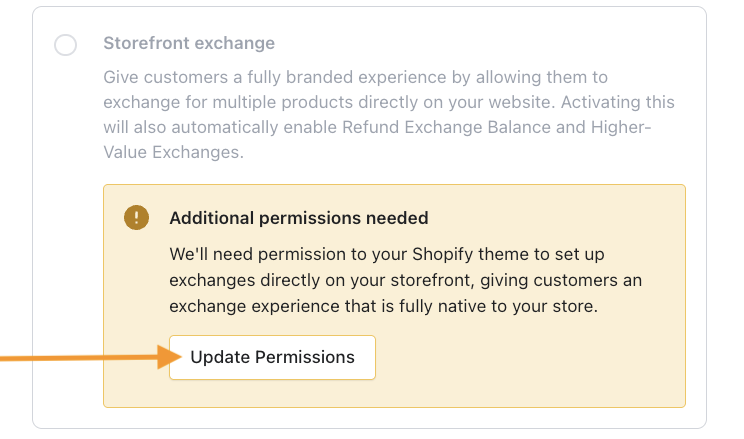
Note: You may need to update your store’s permissions. In your PostCo dashboard, go to Return Settings > Exchange and click Update Permissions in the Storefront Exchange panel to grant access to your store and theme. If you don’t see this option, your permissions are already updated and you can proceed with setup.
1. Enable Storefront Exchange
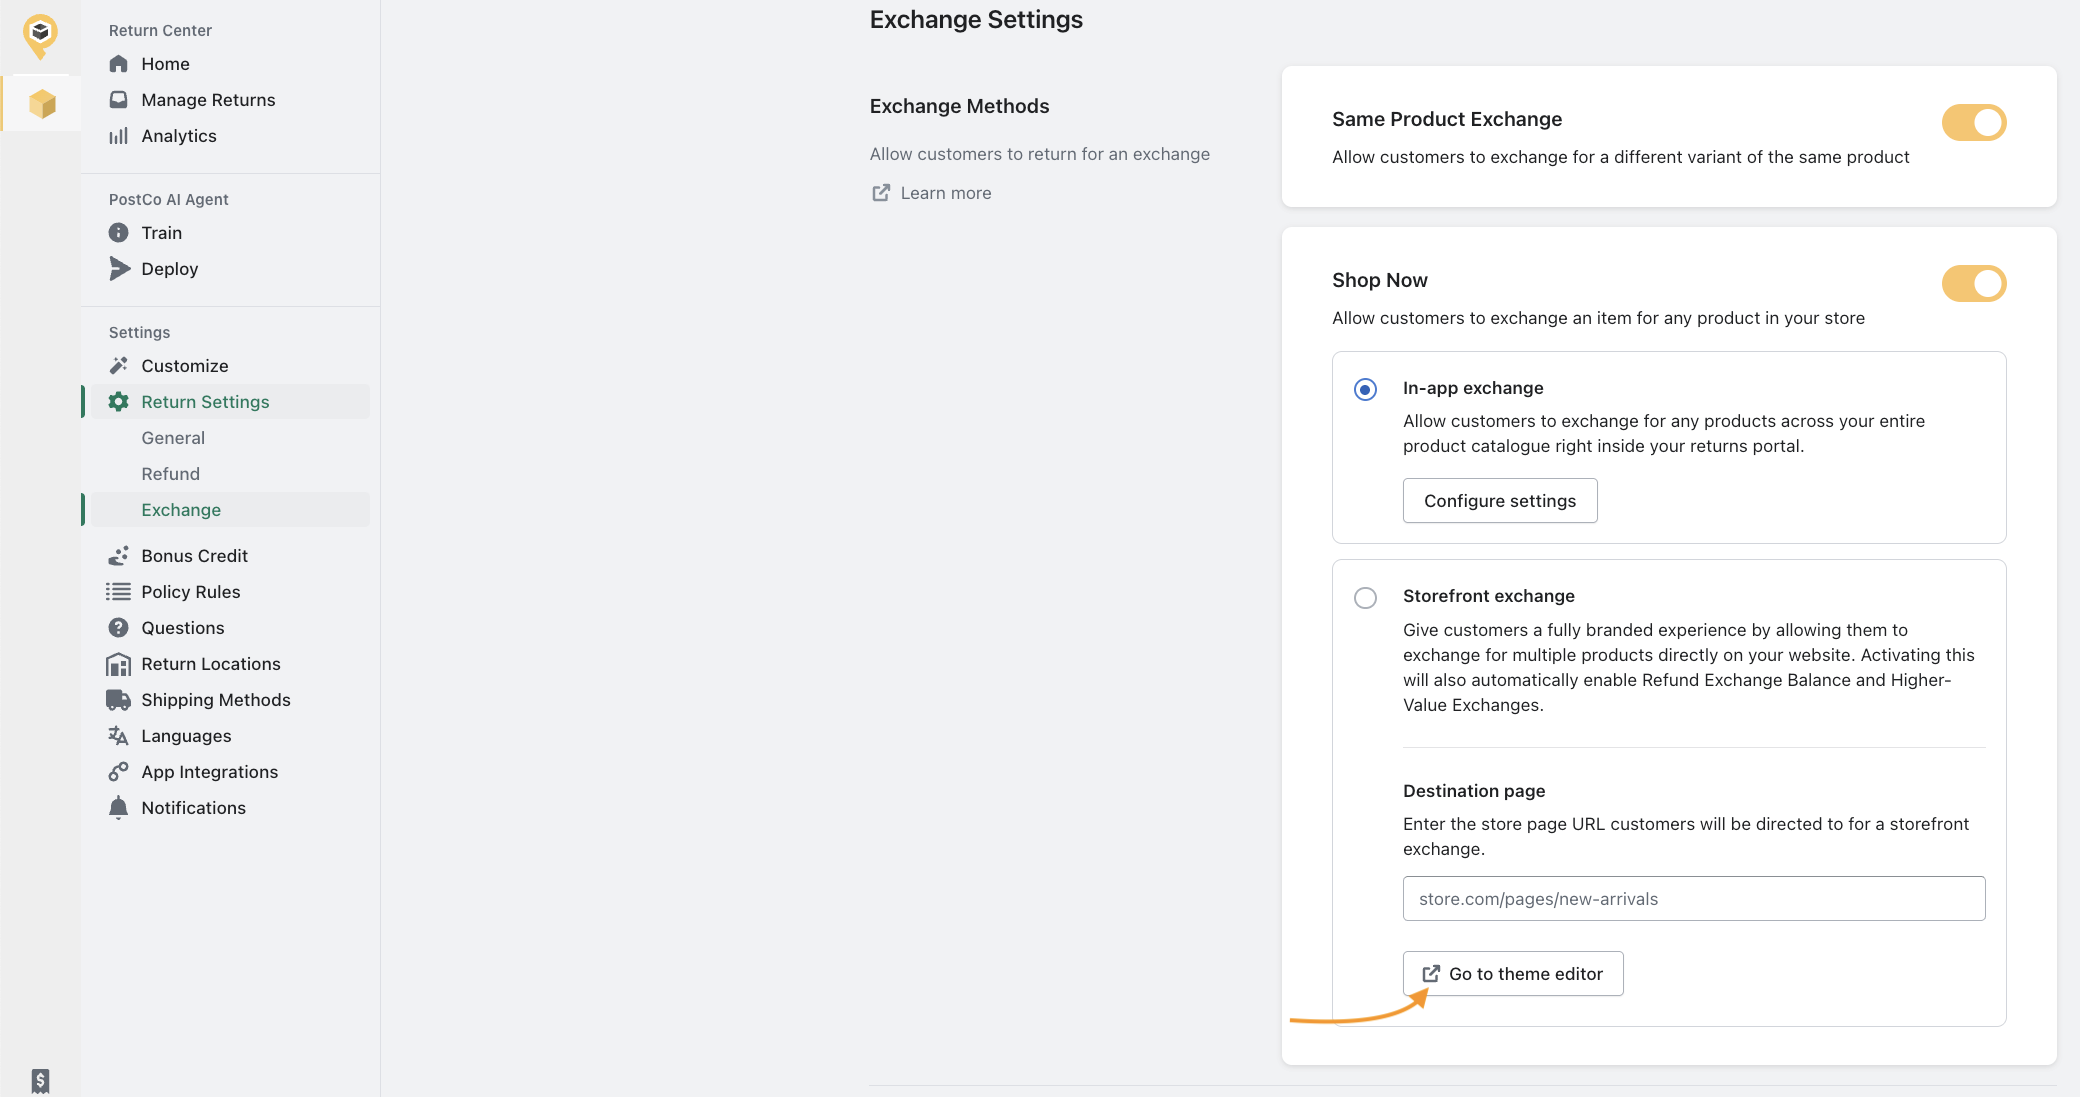
Having navigated to Return Settings > Exchange in your PostCo dashboard, simply click on 'Go to theme editor' in the Storefront Exchange settings panel.
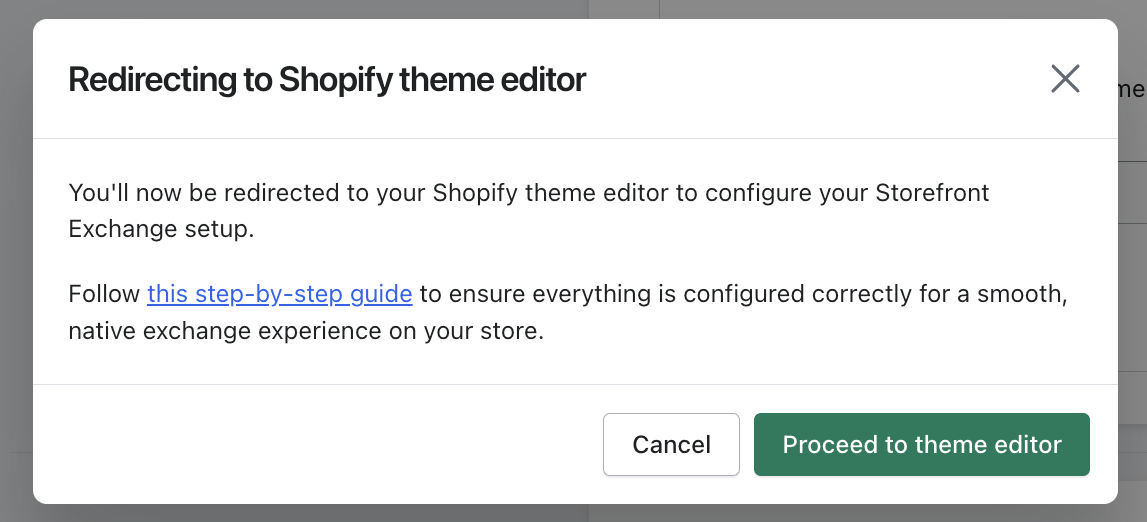
This would lead you to the Shopify theme editor.
The message box below would pop up and you can simply click 'Proceed to theme editor'.
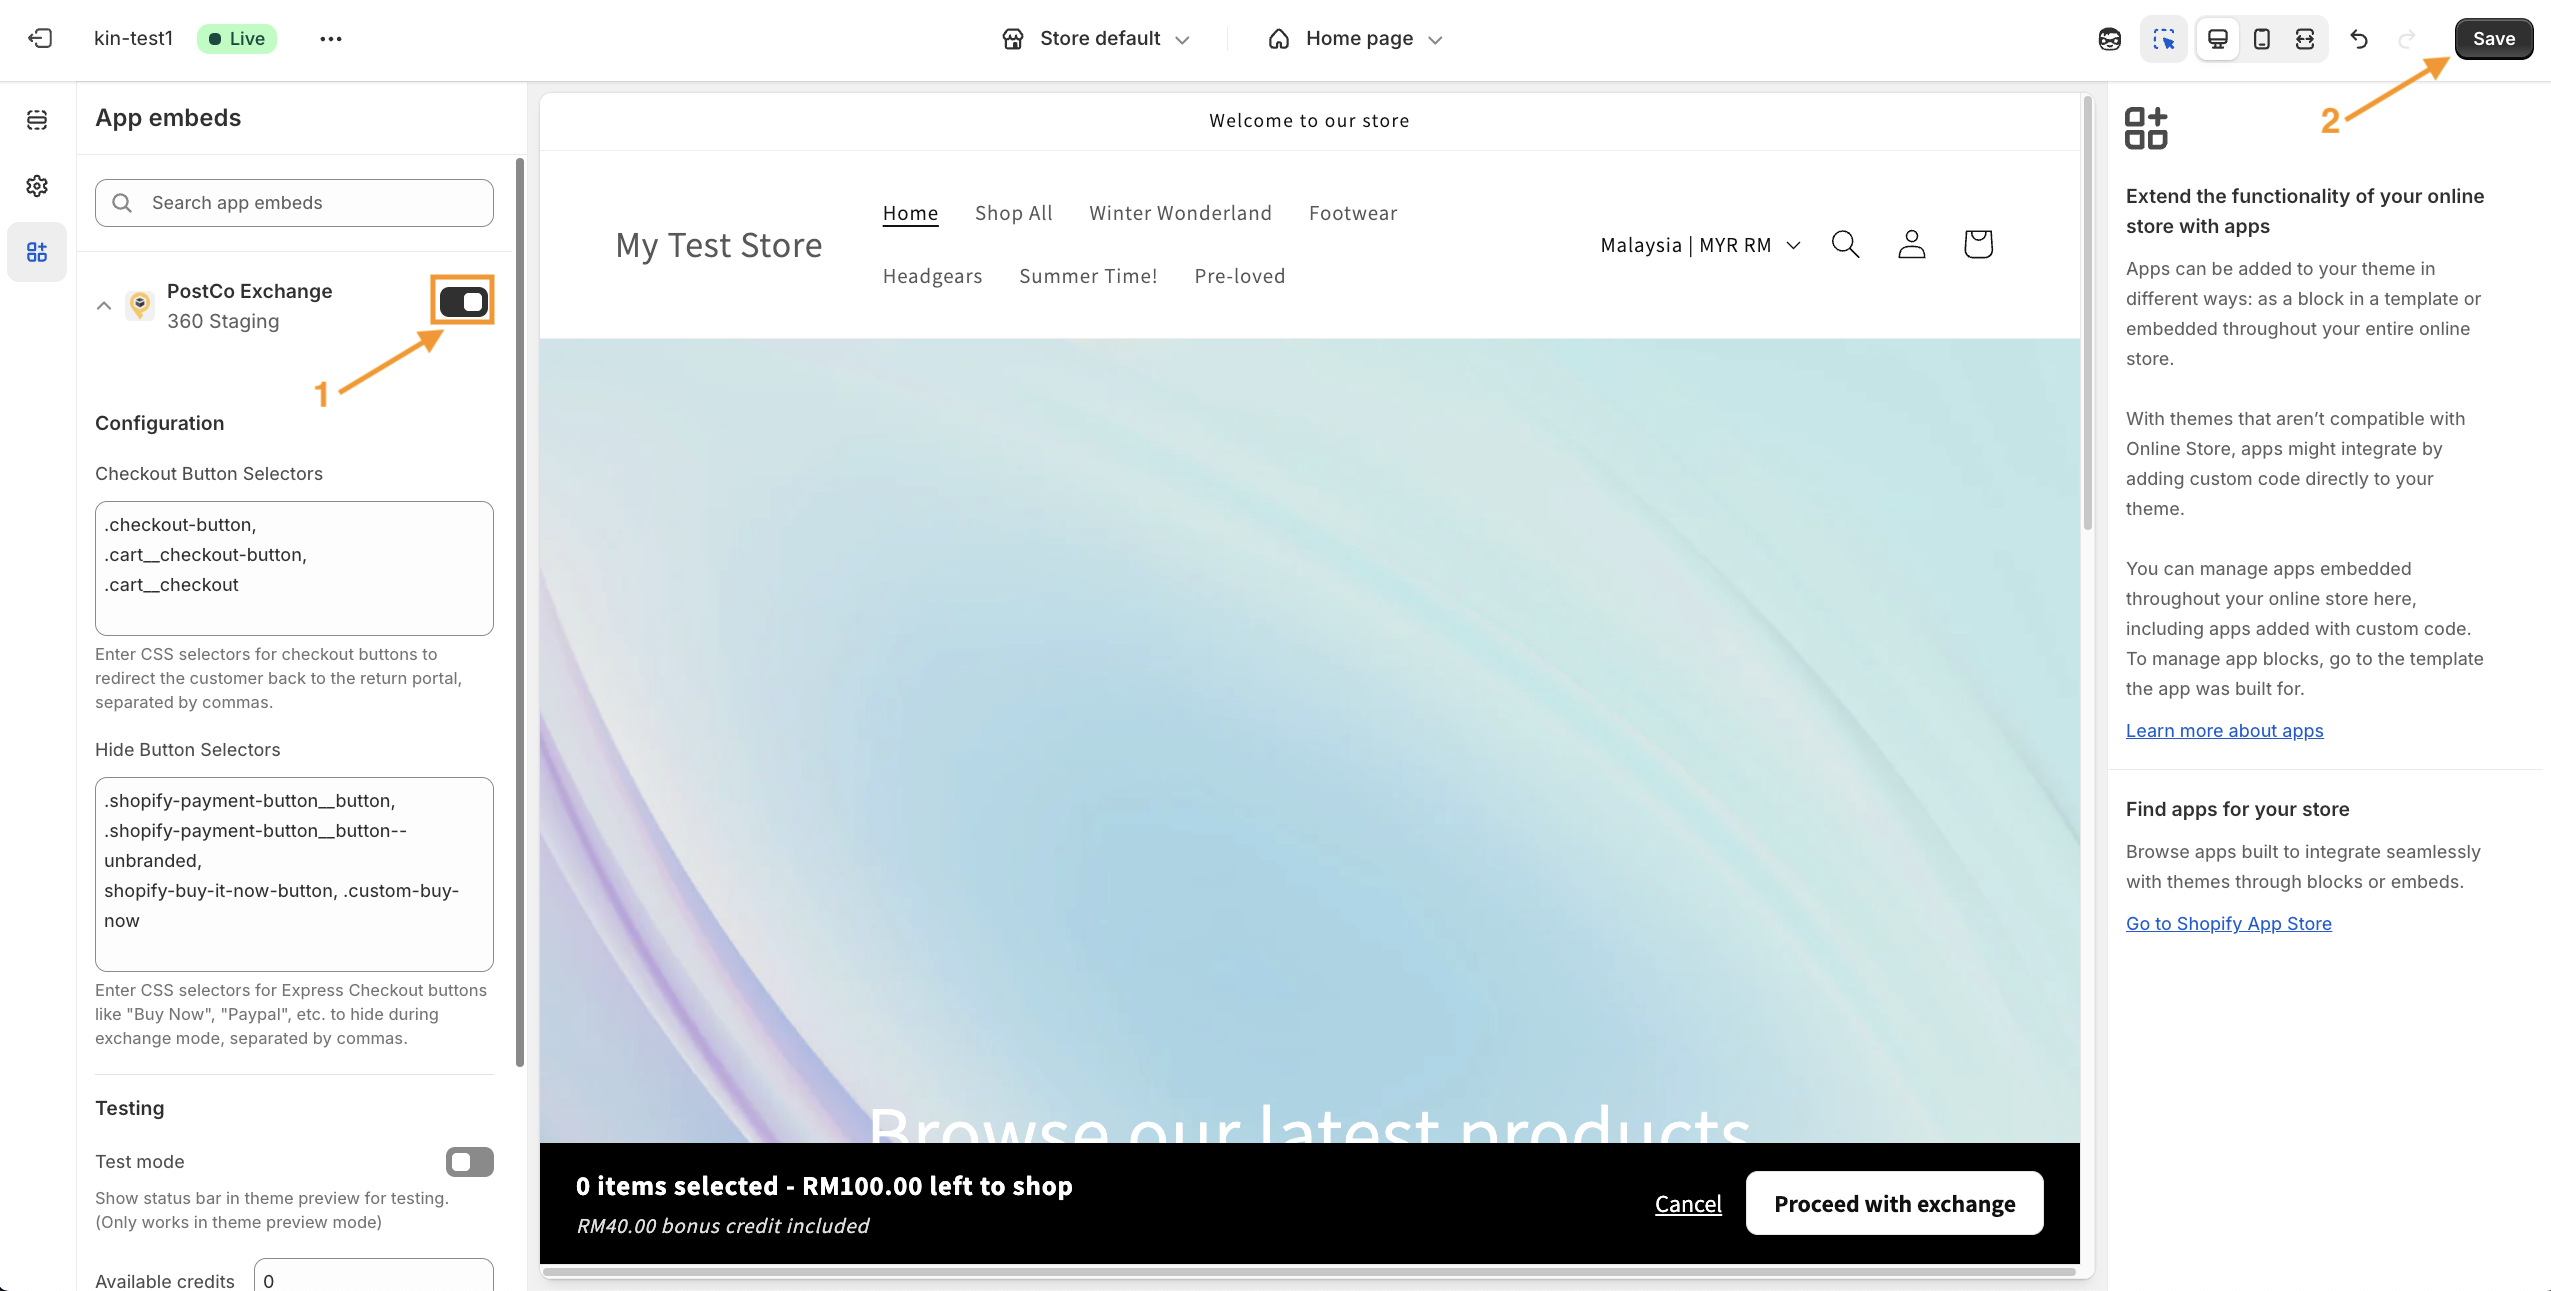
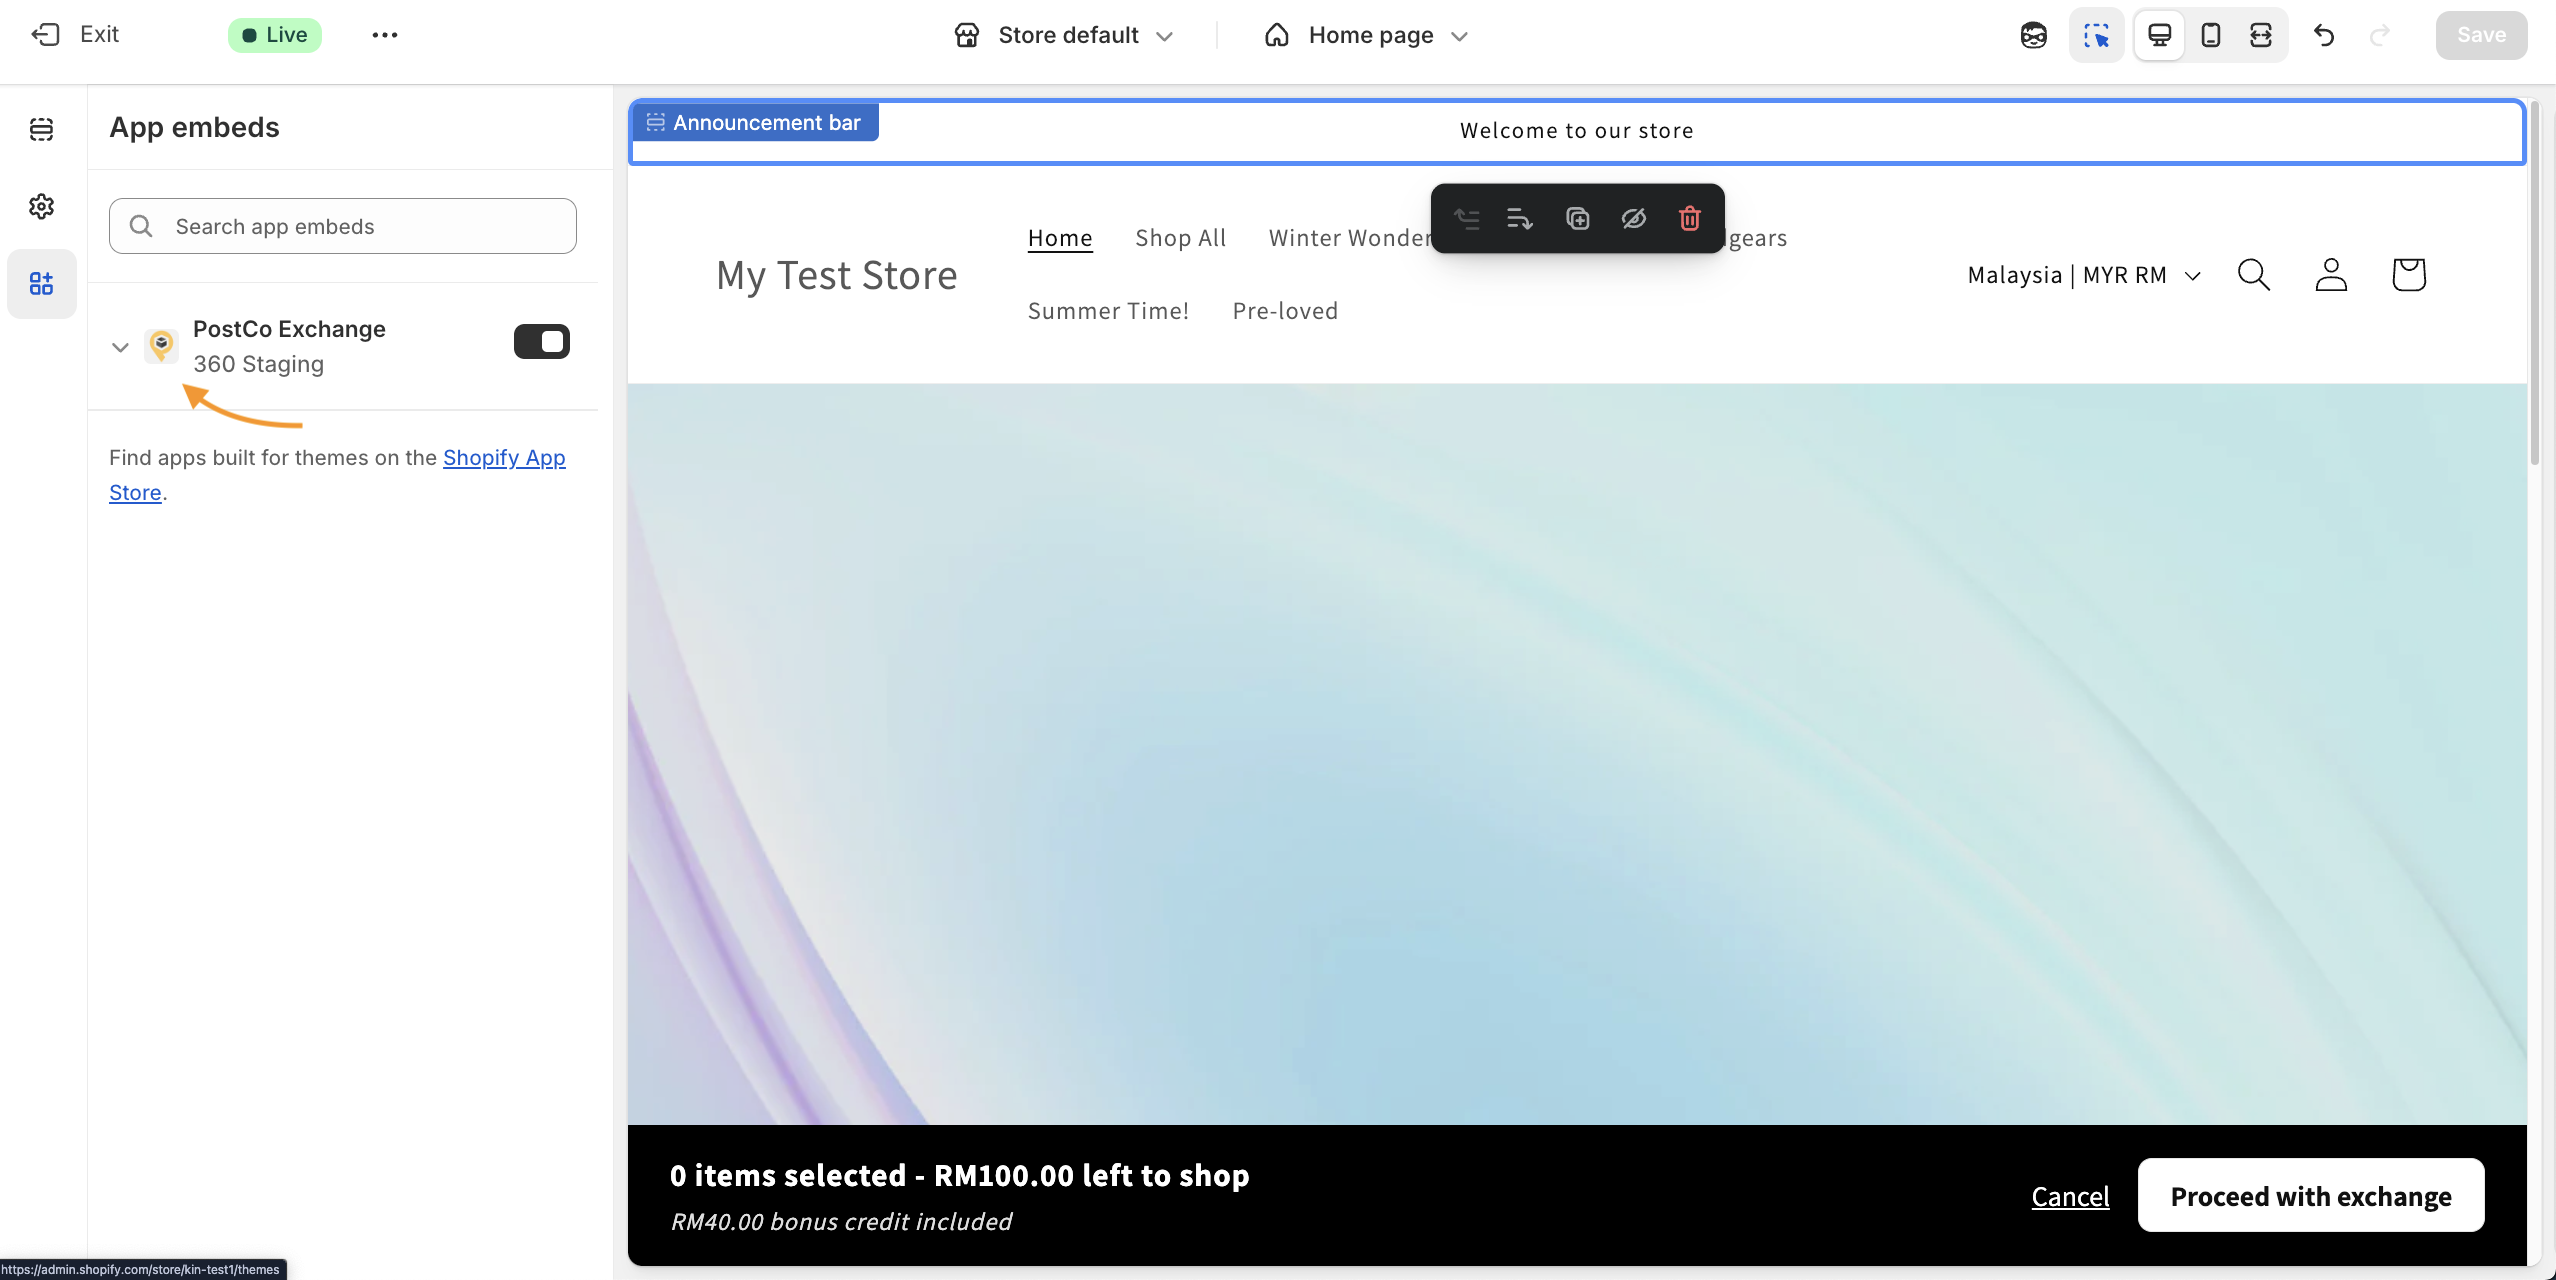
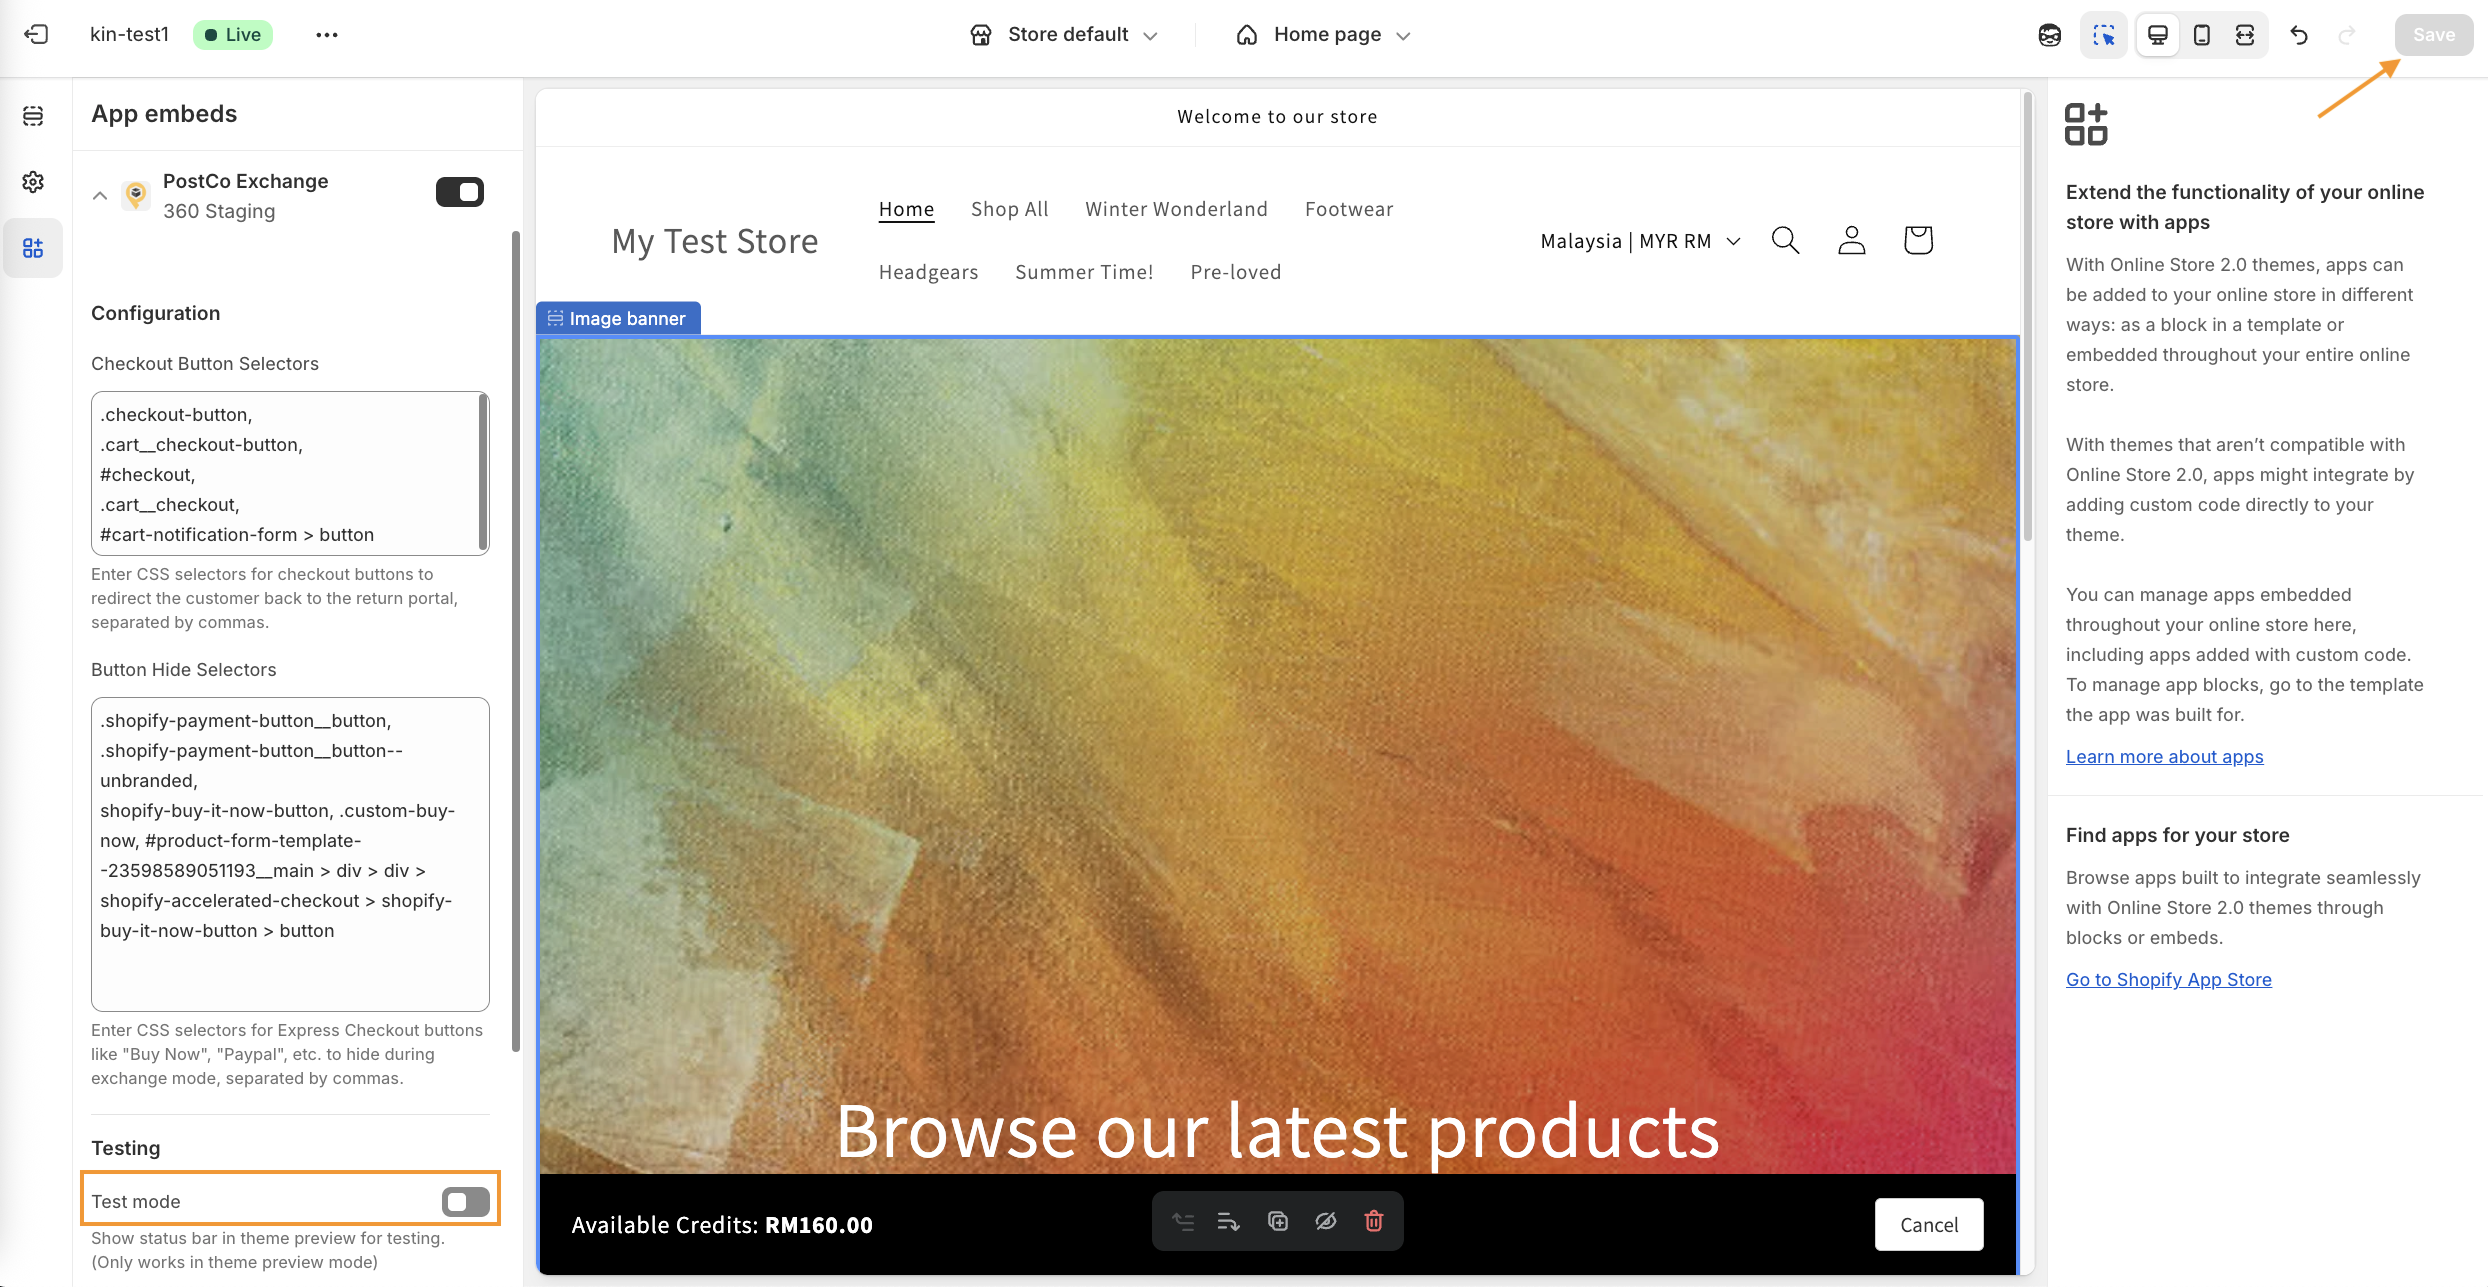
When in the Shopify theme editor, click on the PostCo Exchange toggle to enable Storefront Exchange and hit 'Save'.
2. Configure checkout and express checkout buttons
Redirect checkout buttons
To ensure returns are completed within the returns portal (and not your store’s regular checkout), all checkout buttons in the Storefront Exchange flow must be configured to redirect customers back to the returns portal.
Here's what you'll need to do:
Locate the checkout buttons
Copy the button selectors
Paste the selectors in the checkout button selectors field of the Shopify theme editor
Click 'Save'
Below is a video guide on how this can be done:
Common locations of checkout buttons
While the location of checkout buttons depend on your Shopify theme, here are some common examples of where checkout buttons can be found:
In the cart notification:
Note: Cart notifications typically drop down from the top when an item is added to the cart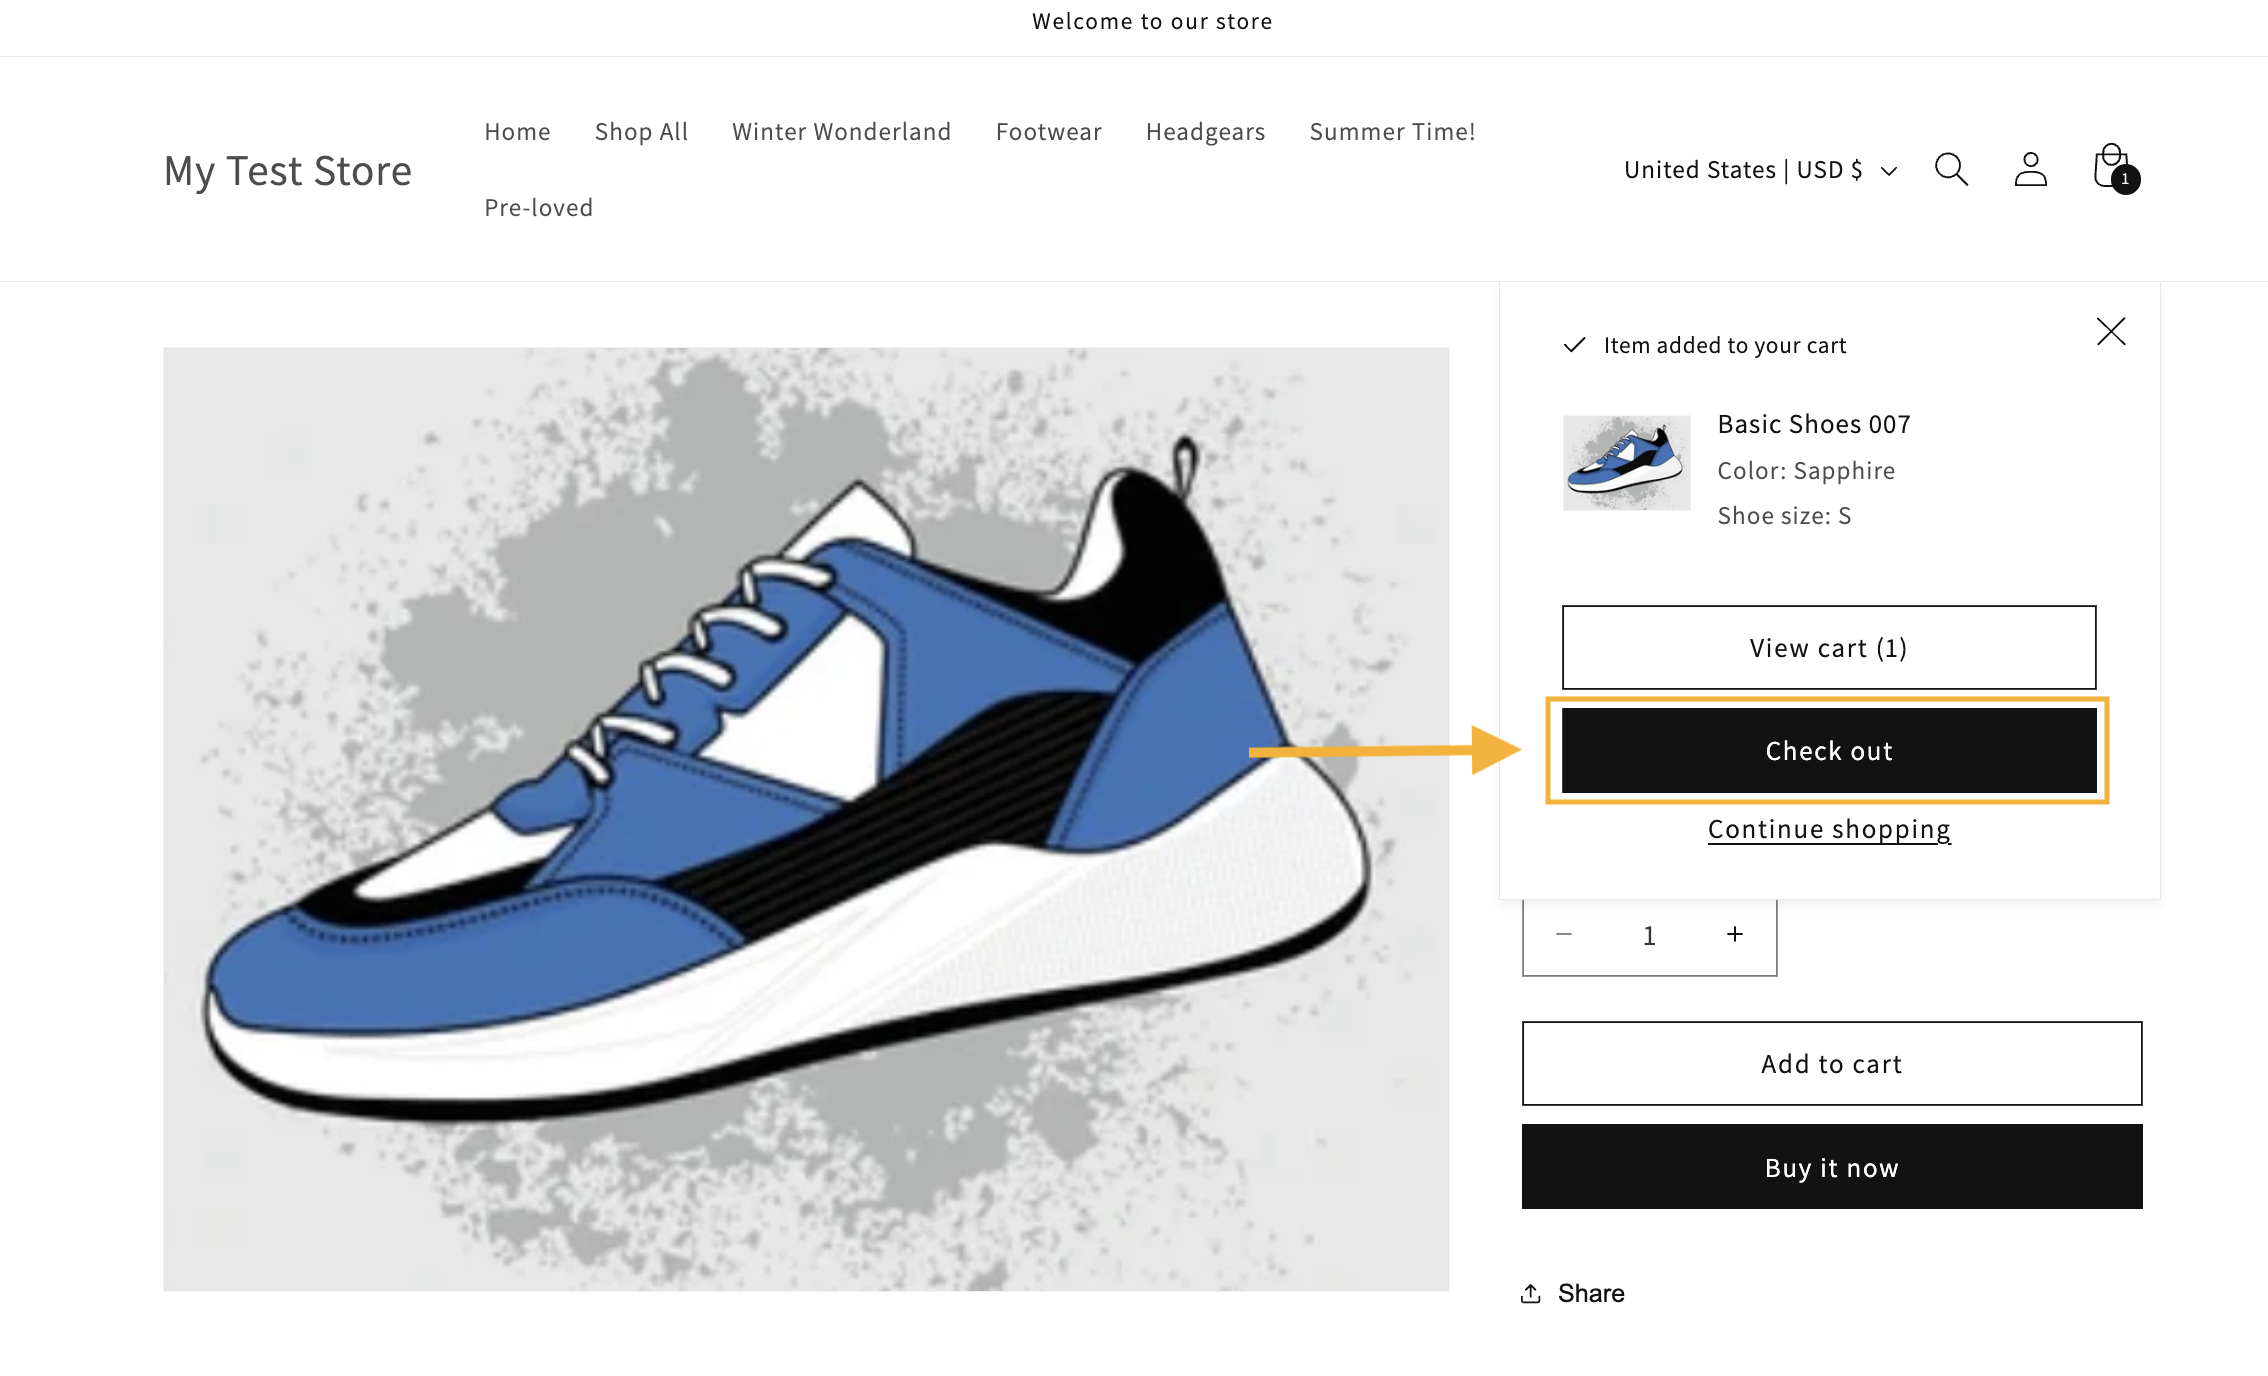
In the cart drawer:
Note: Cart drawers typically slide out from the right when an item is added to the cart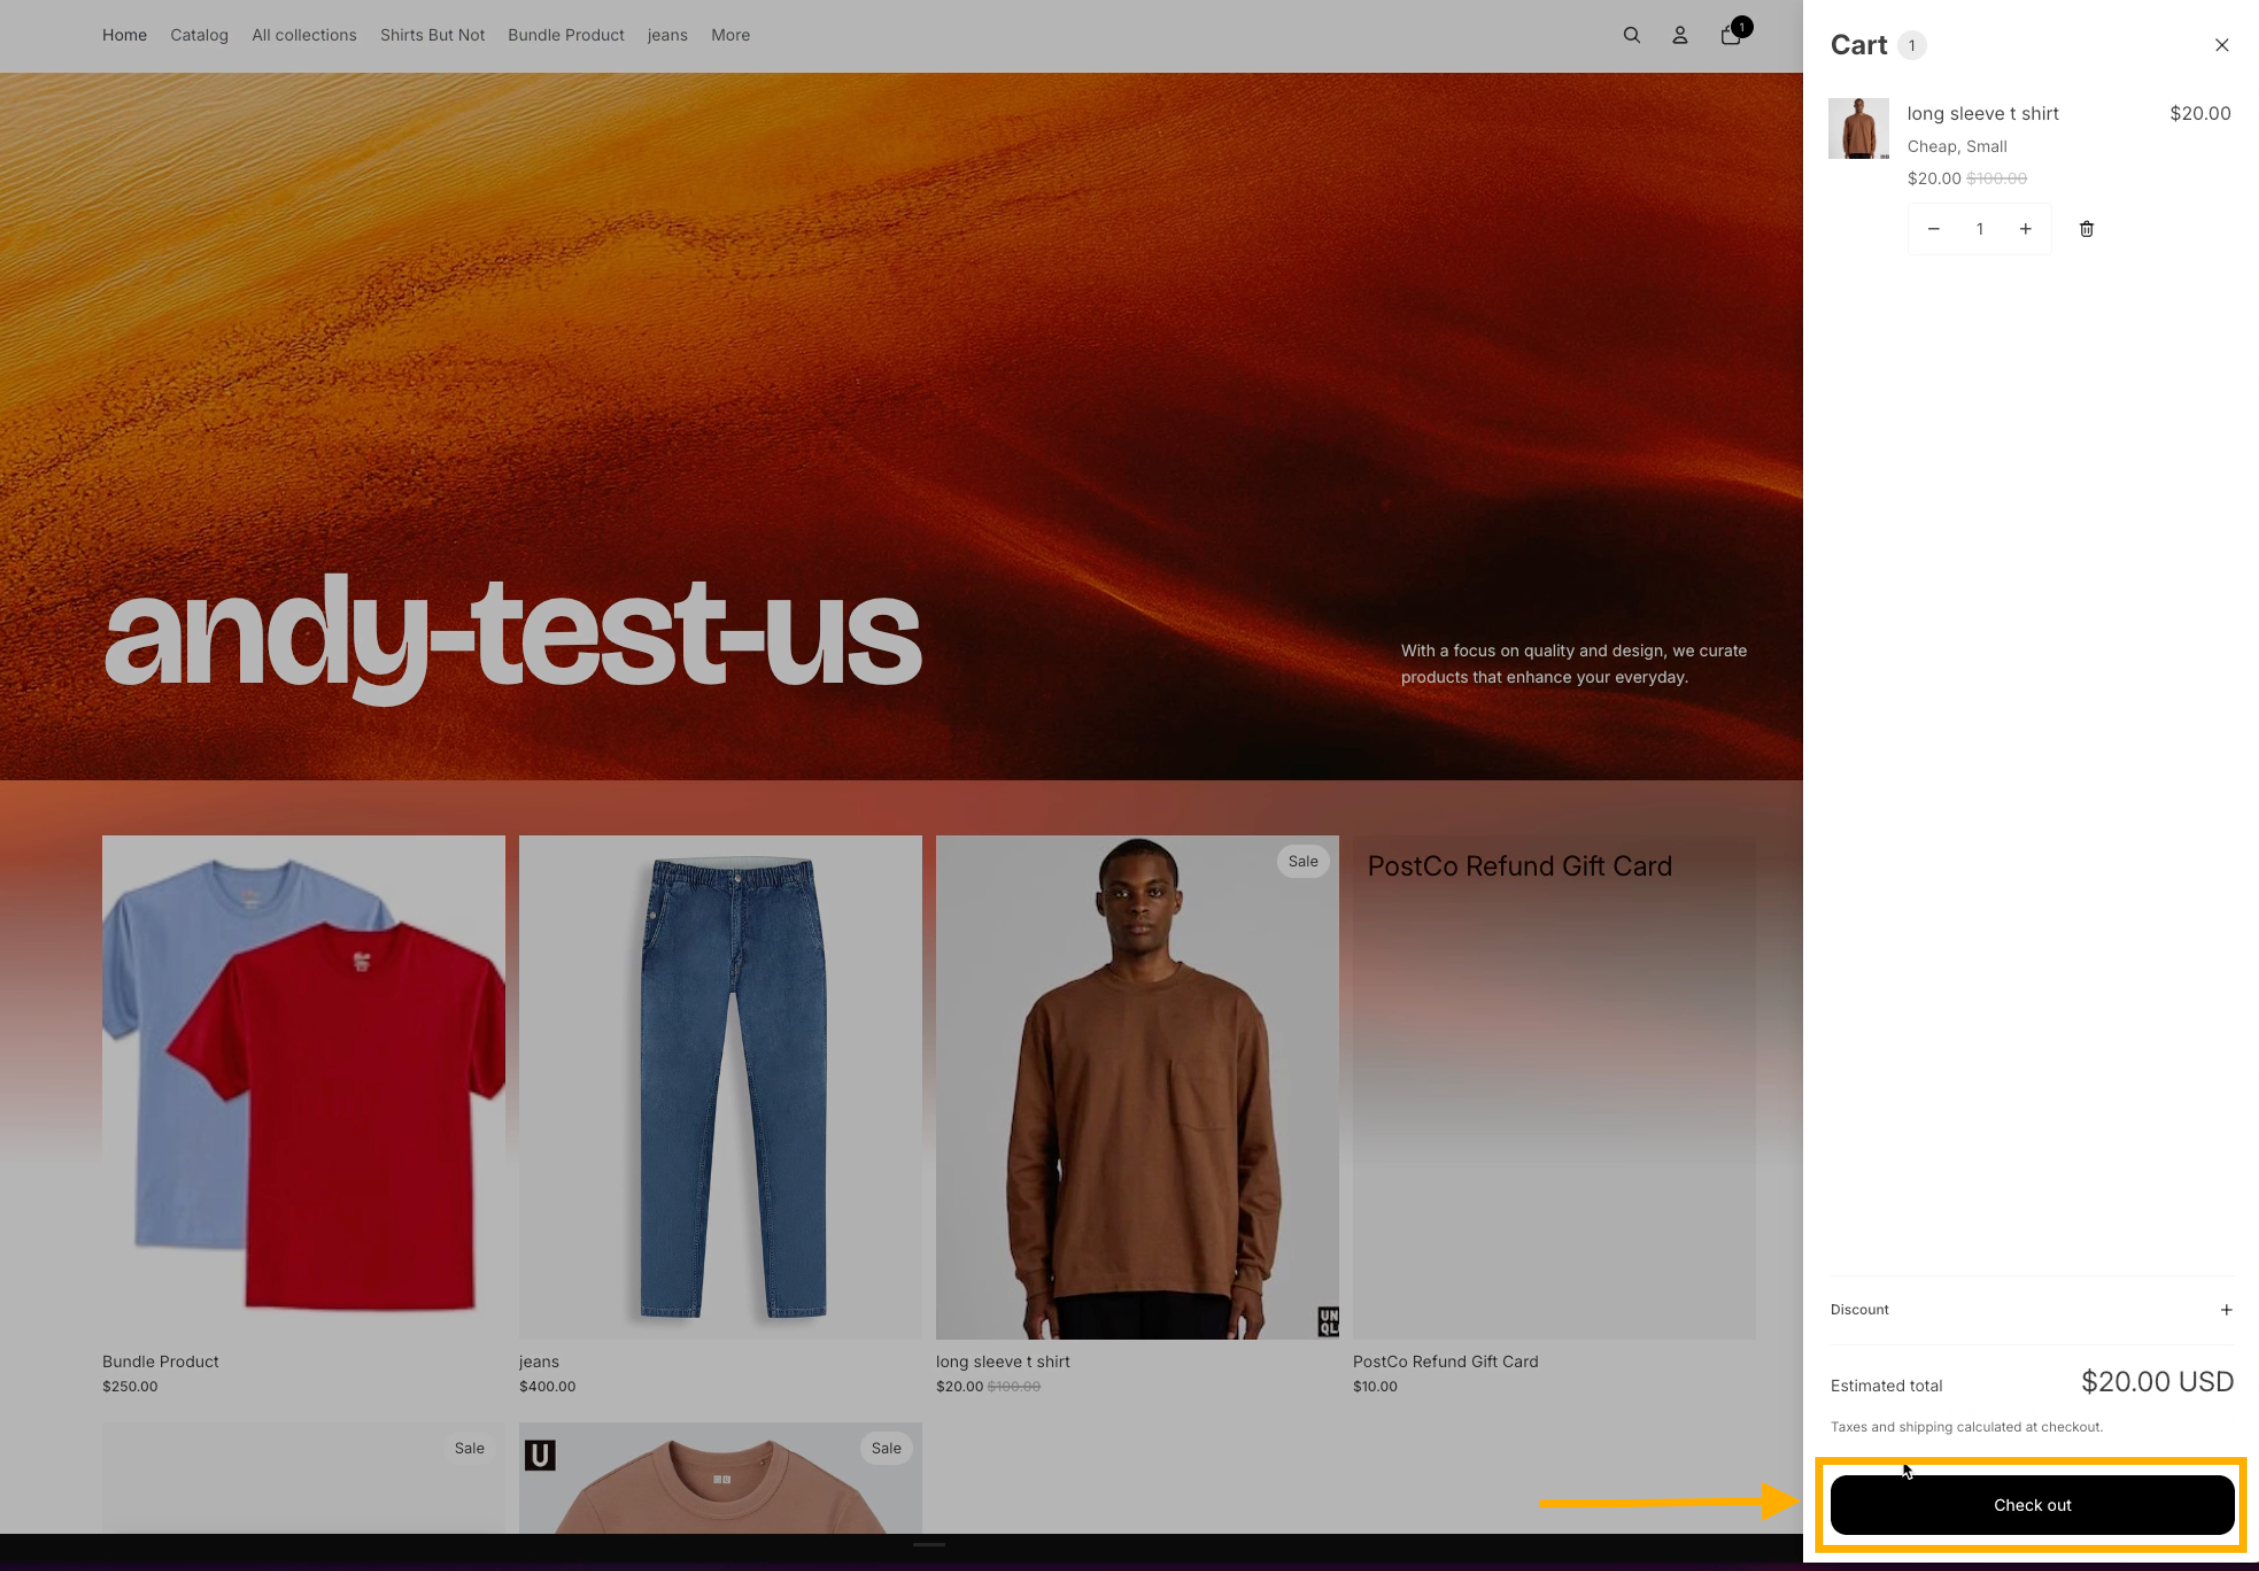
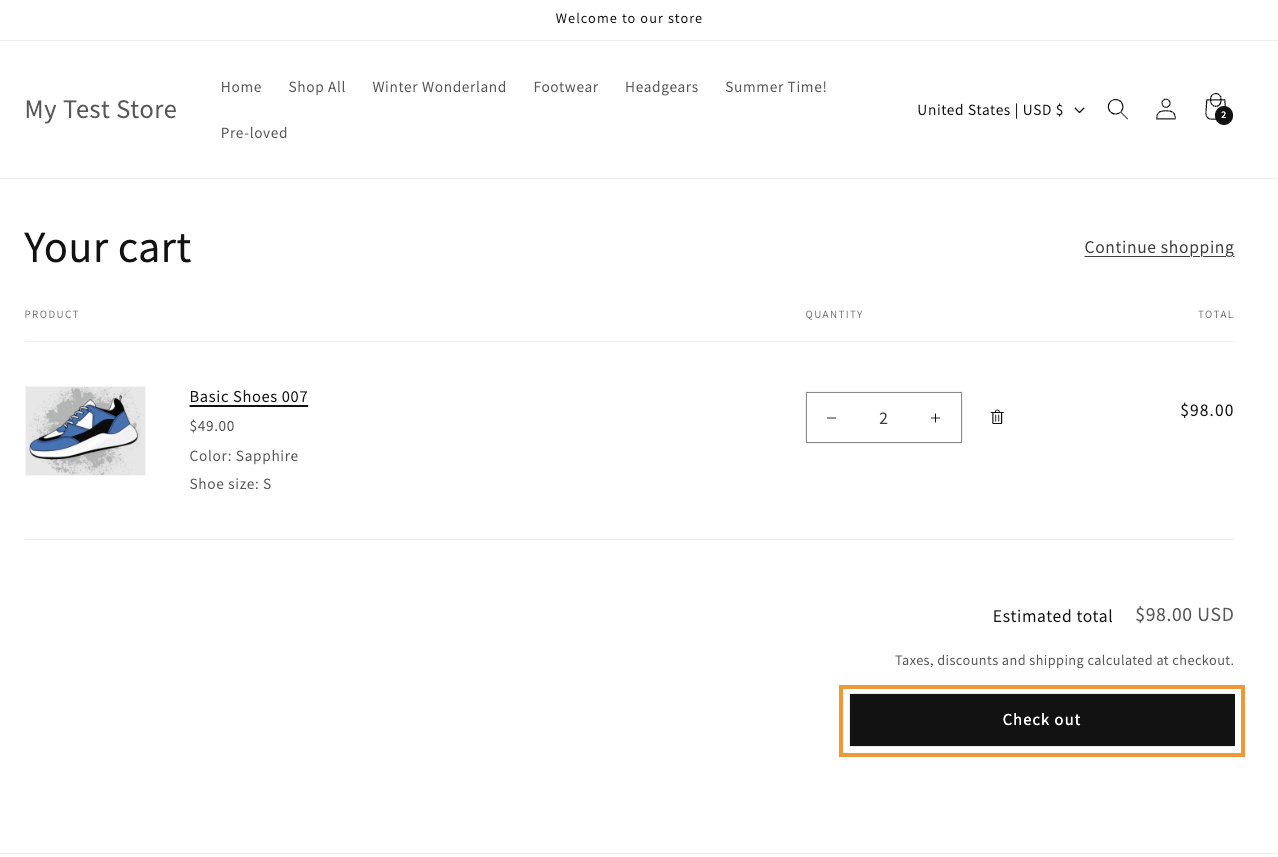
On the cart page:
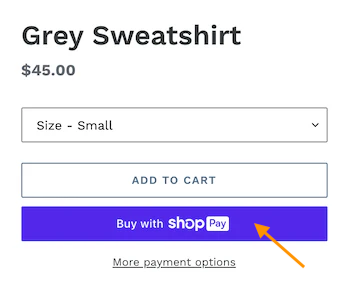
Hide express checkout buttons
Depending on your Shopify theme, you may also have express checkout buttons that skip the cart and take customers straight to the checkout page.
These need to be hidden to keep the exchange process within the returns portal.
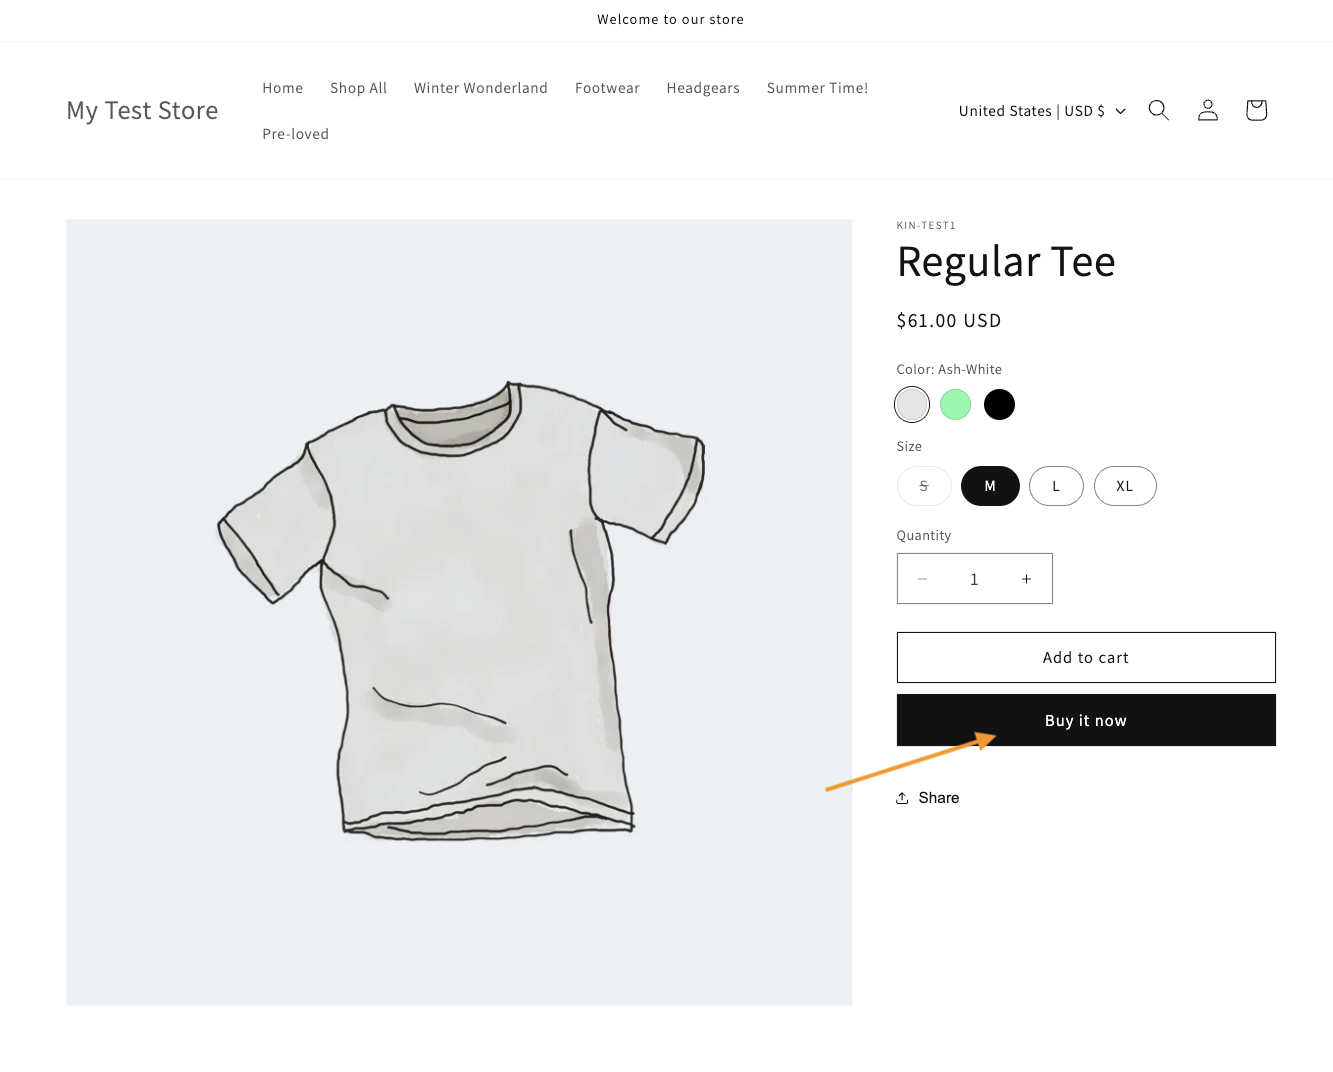
The two common types of express checkout buttons are typically located on (but not limited to) the product page:
Unbranded - Shopify's native 'Buy it now' button
Branded - Includes logo of 3rd-party express checkout providers e.g. Shop Pay, PayPal, etc.
Note: For other types of branded express checkout buttons, you may refer to Shopify's help guide here.
Here's what you'll need to do:
Locate the express checkout buttons
Copy the button selectors
Paste the selectors in the hide button selectors field of the Shopify theme editor
Click 'Save'
Below is a video guide on how this can be done:
3. Test and deploy
Before going live, make sure you test the Storefront Exchange flow to ensure everything is set up correctly. You can do this by enabling test mode in the Shopify theme editor. Once the testing is completed, remember to disable test mode.
Enable test mode
Simply follow the step-by-step instructions below to set test mode up:
In the Shopify theme editor, click on PostCo Exchange to expand the configuration panel
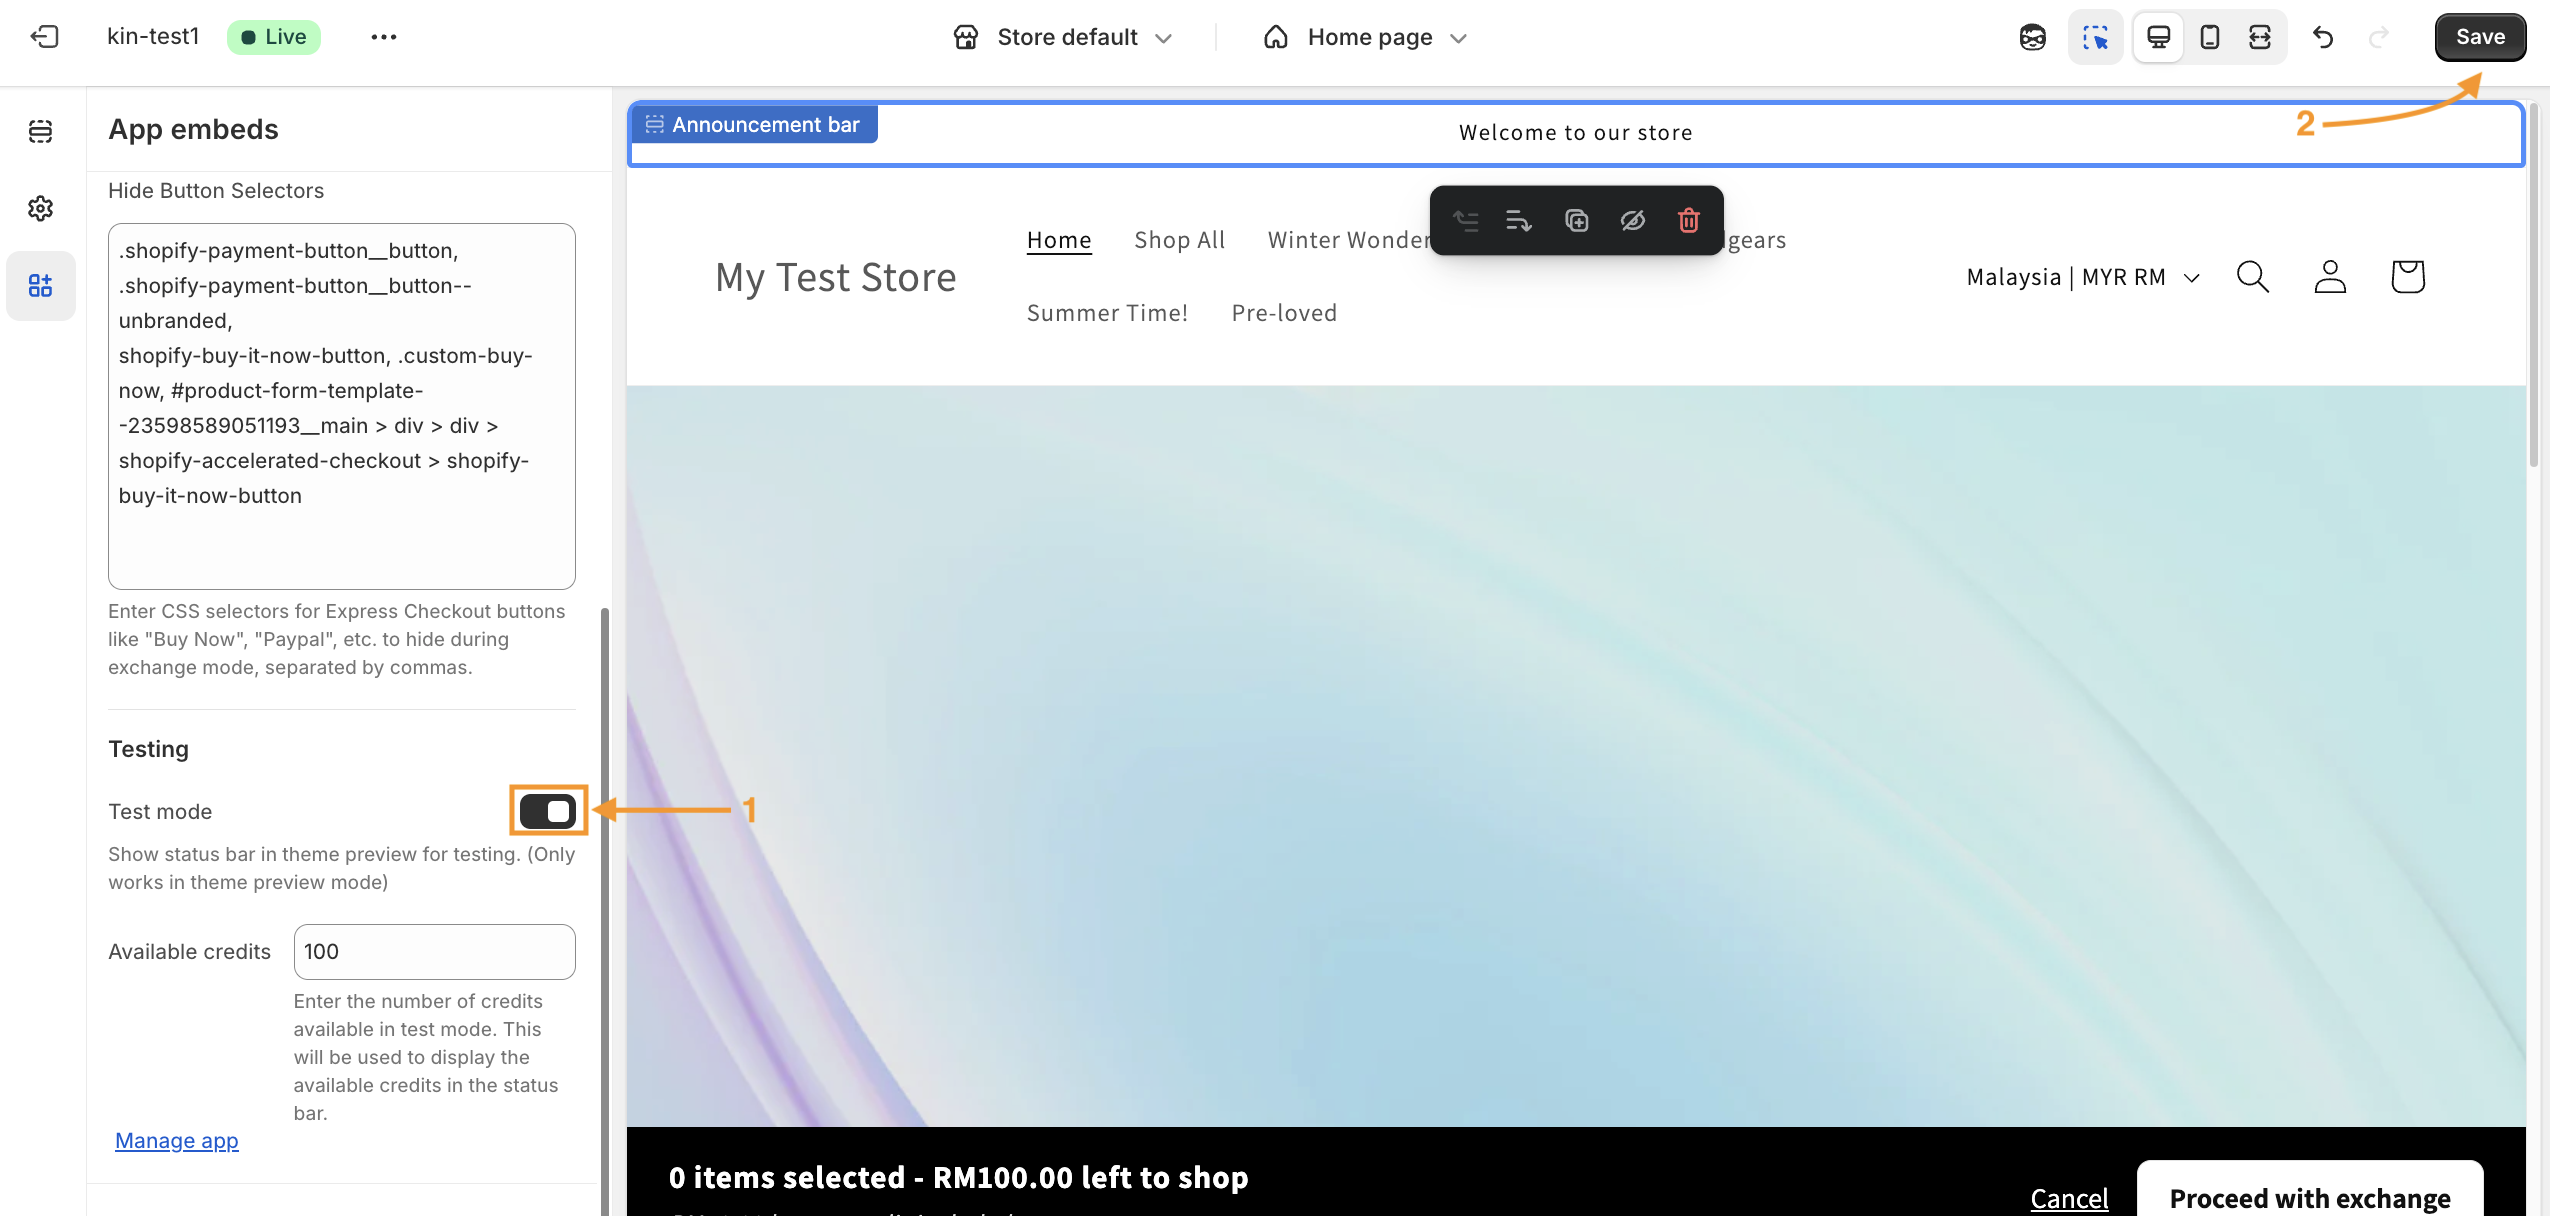
Scroll down to the Testing section and set a test credit amount
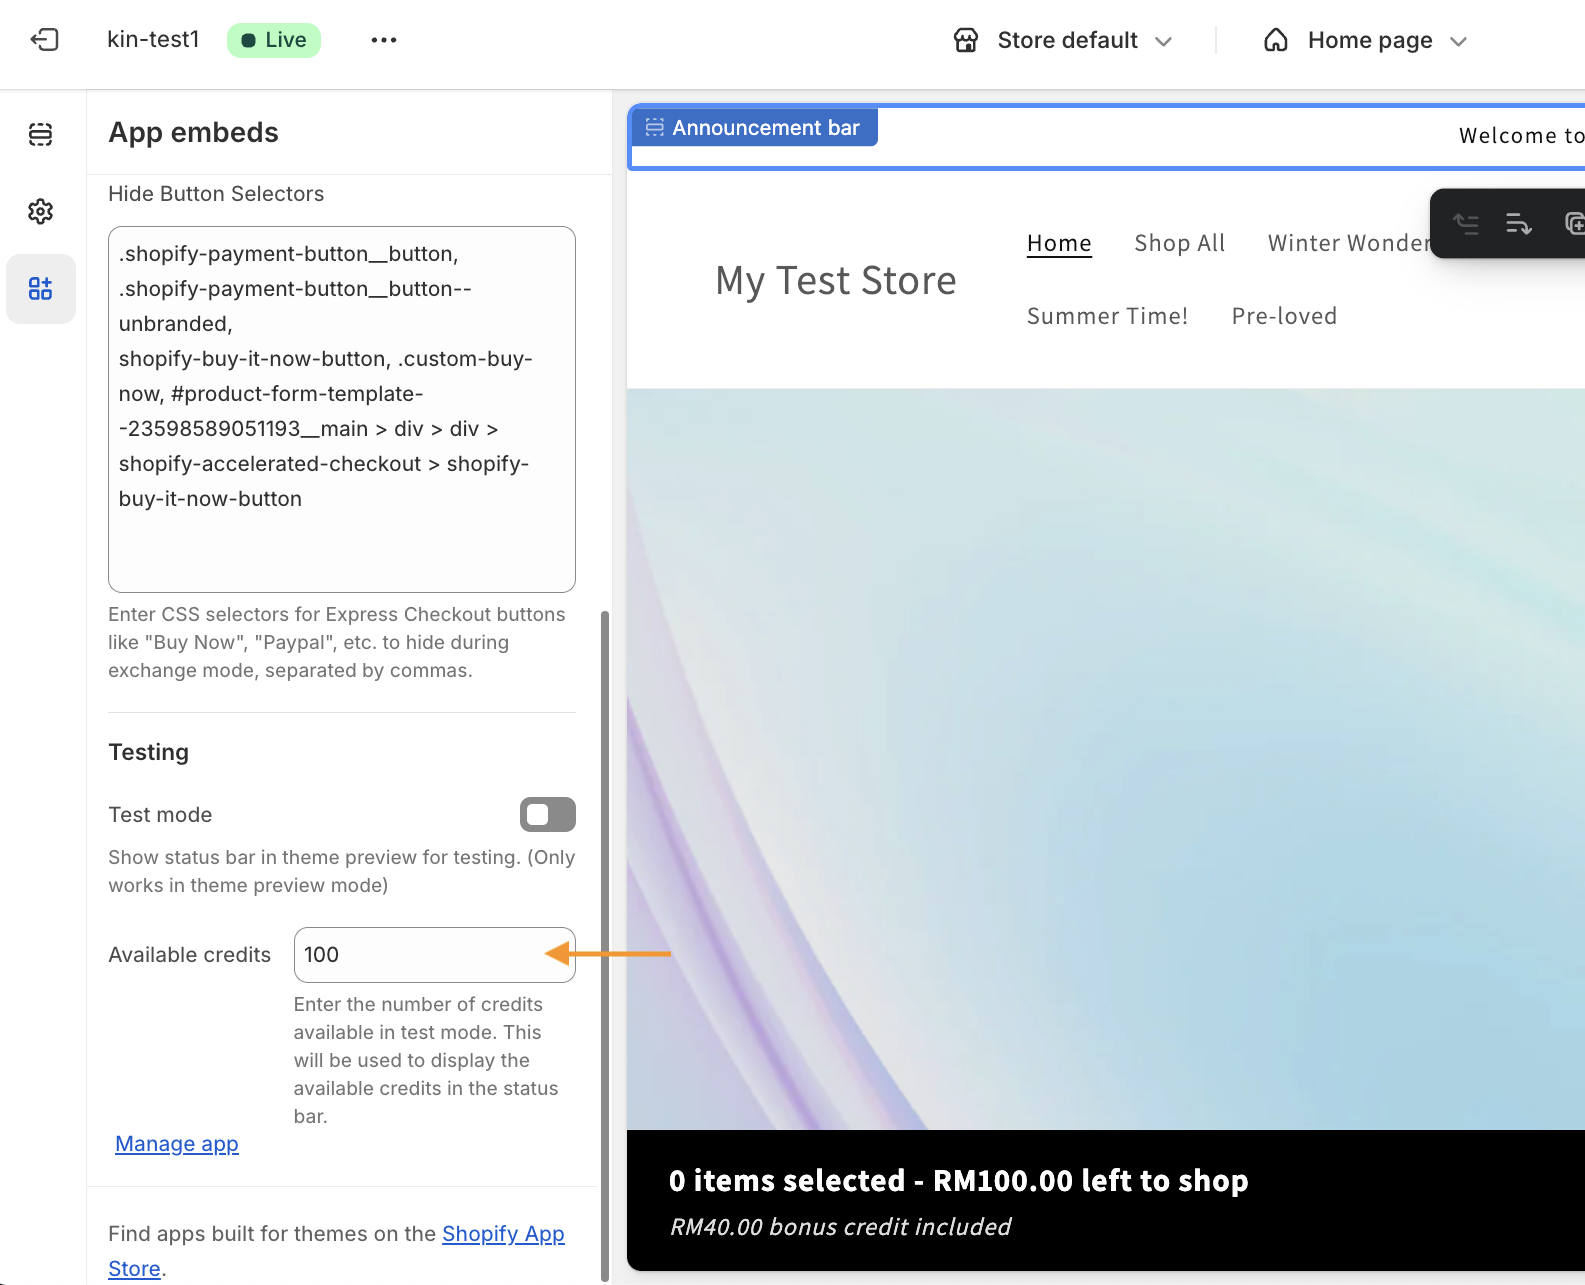
Enable test mode and hit 'Save'
Click on the more options icon (⋯) and select 'View' to open a preview of your store in test mode
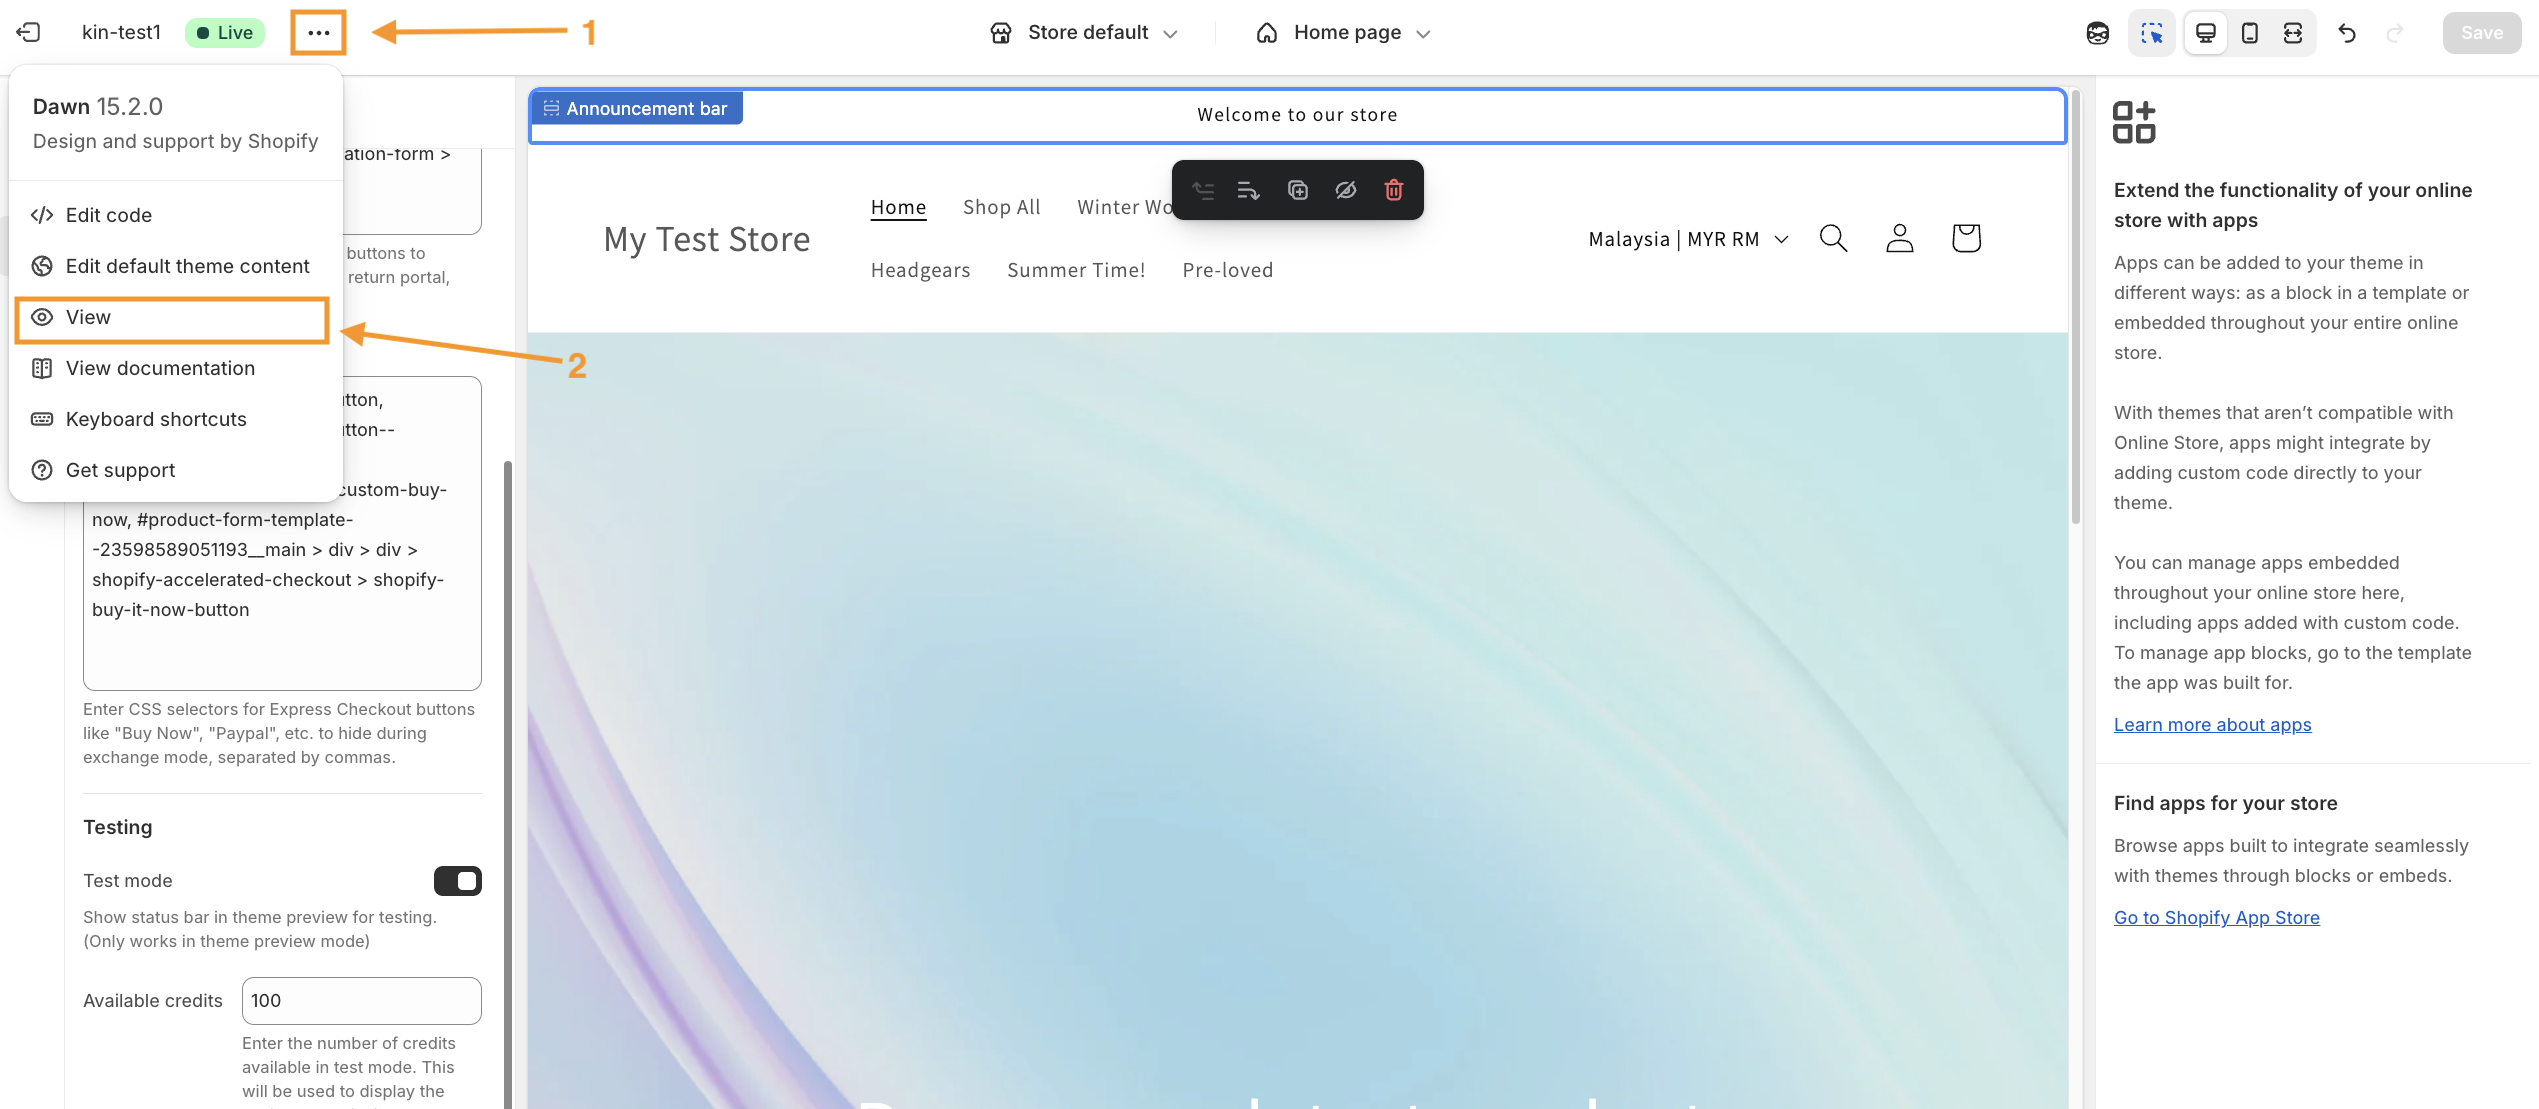
Here's a visual guide on how to set test mode up:
What to look out for when testing?
When previewing your store in test mode, look out for the following:
Test credit reduces based on the items selected - if the exchange value exceeds the available credit, the customer will see the outstanding amount to be paid.

Express checkout buttons are hidden

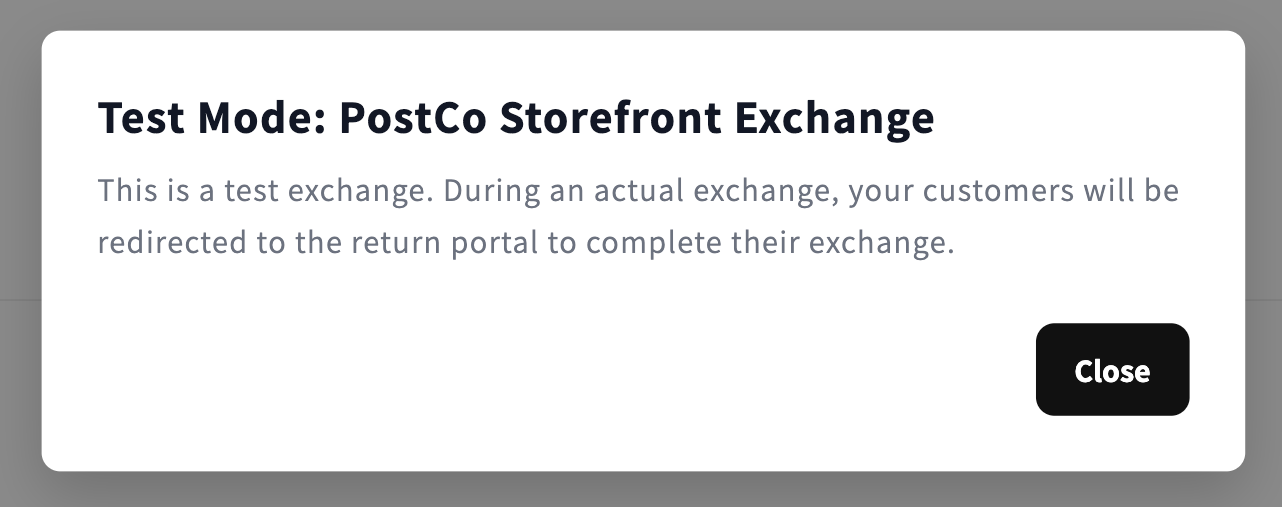
Checkout buttons redirects successfully
Note: When set up correctly, clicking on a checkout button will prompt the following success message.
Disable test mode
Once the Storefront Exchange has been tested successfully, return to the Shopify theme editor to disable test mode and hit 'Save'.
Deploy Storefront Exchange
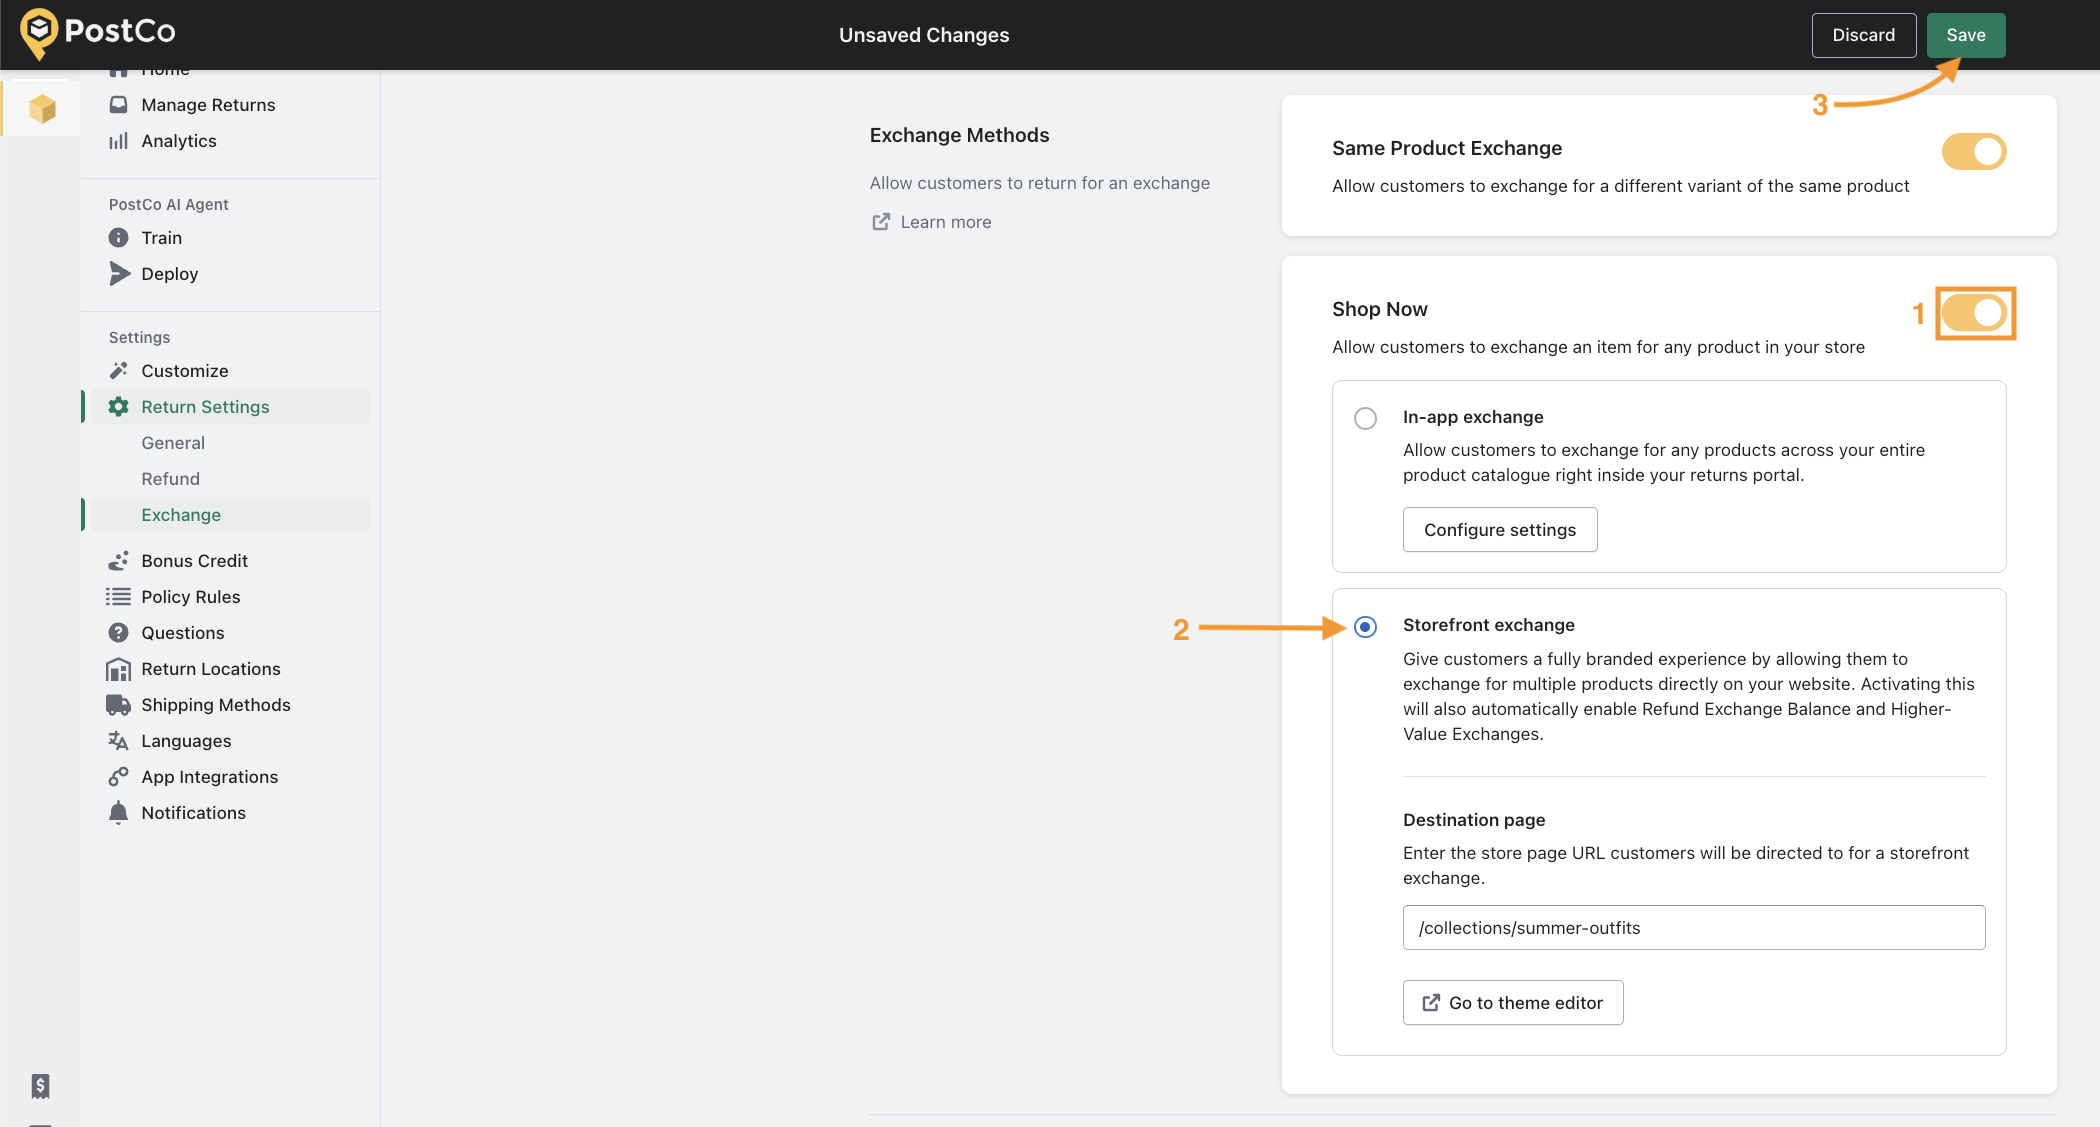
In your PostCo dashboard, enable the Shop Now toggle and ensure that Storefront Exchange is selected. Once you hit 'Save', this will be live and you are good to go!
Frequently asked questions
Why does the option to 'Inspect' not show up when I right click the buttons?
This could happen to you if you're using the Safari web browser. You first need to enable the "Develop" menu in Safari's preferences (Safari > Preferences > Advanced > Show Develop menu in menu bar), then the option to 'Inspect' would now appear when you right-click your Shopify store buttons.Can the customer exit the exchange halfway if they changed their minds?
Yes, customers can exit the storefront exchange flow by clicking on 'Cancel' at the bottom of their screen. This would redirect the customer back to the return item selector page in the returns portal.Can I redirect my customers to a specific page on my store during a storefront exchange?
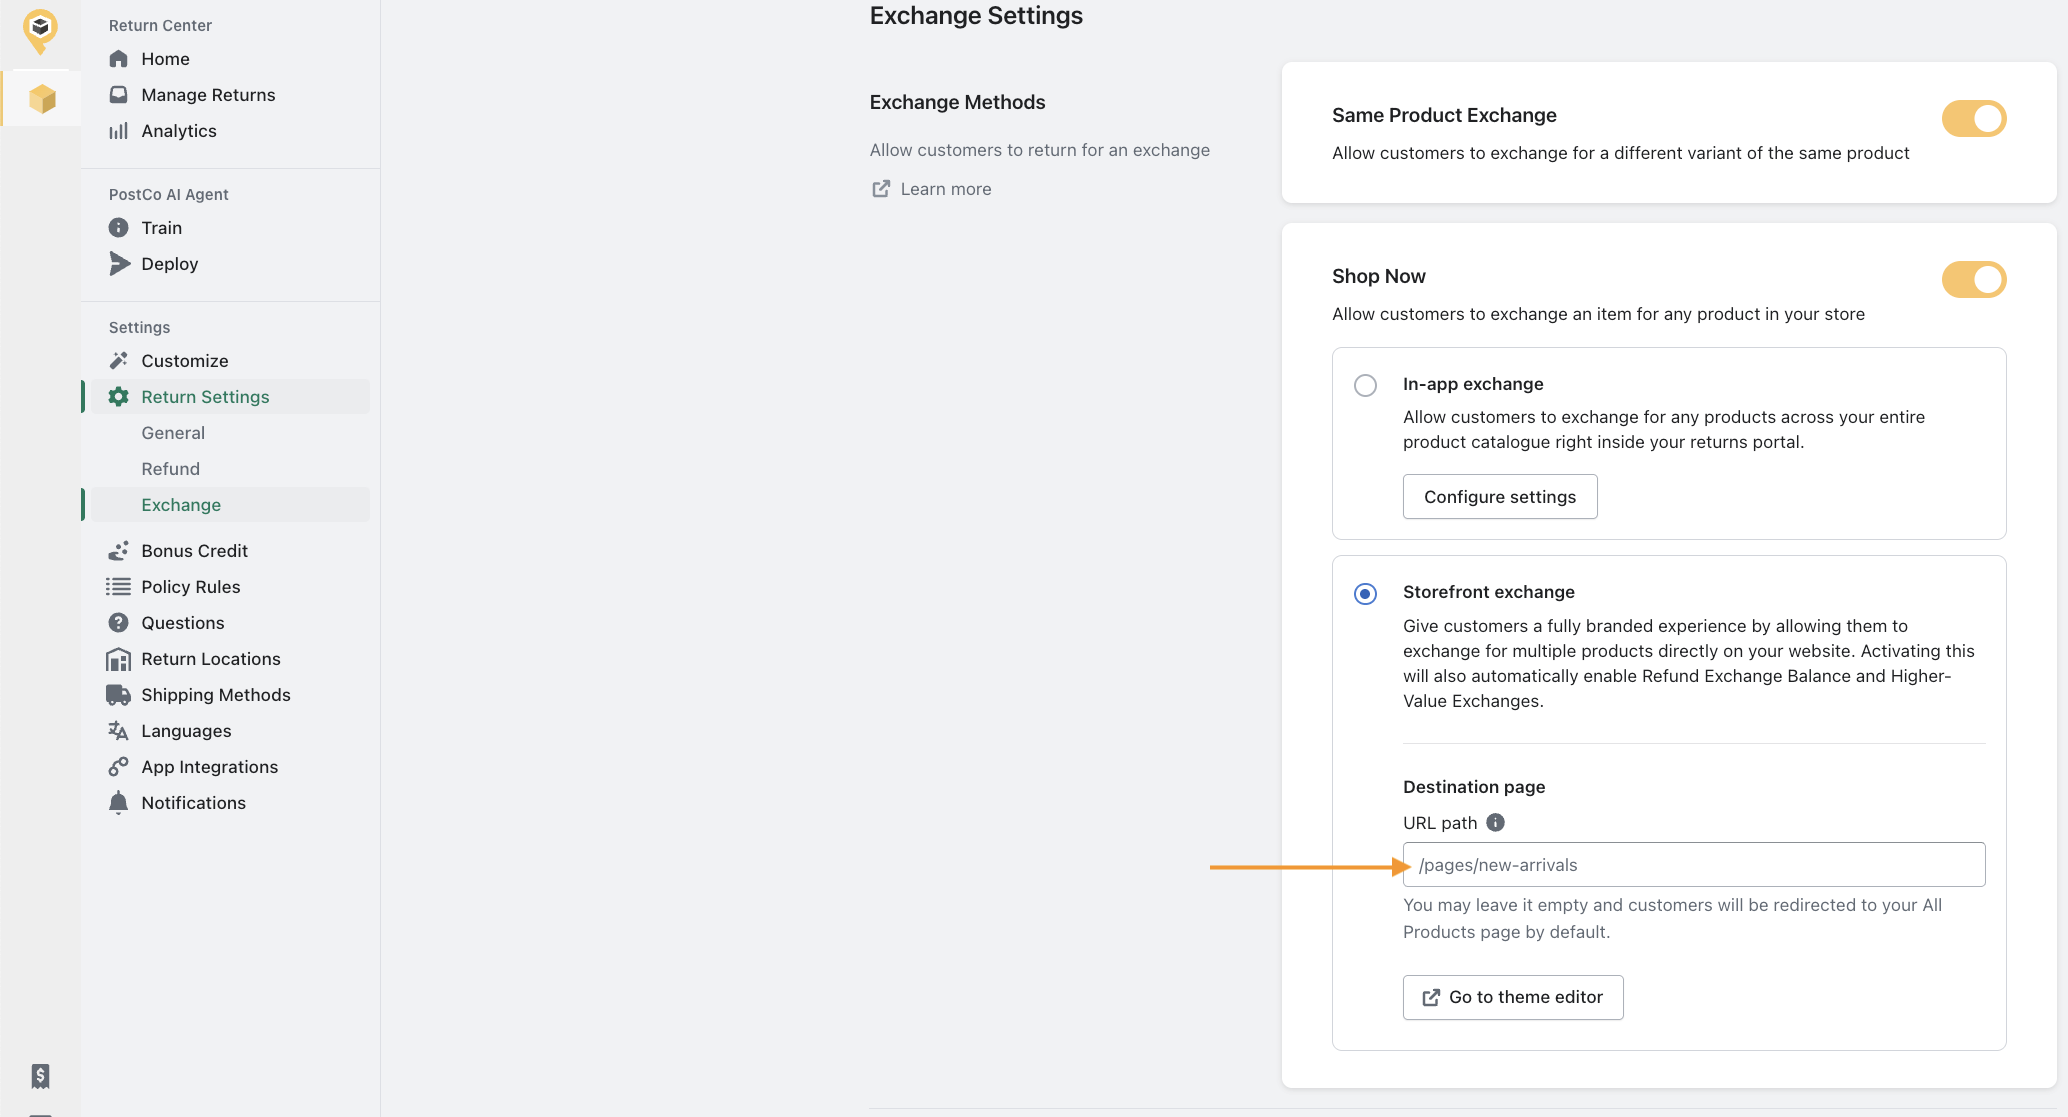
Yes, you can guide customers to a specific page while making a storefront exchange using the destination page. This is useful for highlighting particular collections or categories (e.g. “New Arrivals” or “Best Sellers”).
To set it up, enter the URL path of the page (for example, from "https://my-store.com/pages/new-arrivals", use "/pages/new-arrivals") in the field provided. Customers will then be redirected there during the storefront exchange.If left blank, they’ll be directed to your All Products page by default.
Storefront Exchange is available only for Premium and Enterprise plan.