
Can I customise what my customers see while selecting a return method?
Yes, you can edit the copywriting of return methods (exchange, store credit, and refund) that your customers see during their returns journey to match your brand’s tone and voice. To do this, head over to the Customize tab in your Retailer Dashboard and navigate to the Prompt Page and Return Method Selector Page sections.

Editing what my customers see
Here, you may customise the wordings of the primary & secondary options that a customer sees when landing on the Prompt Page.
Note: Switch to the ‘Store Credit’ tab to customise the contents when store credit is set as the primary option.
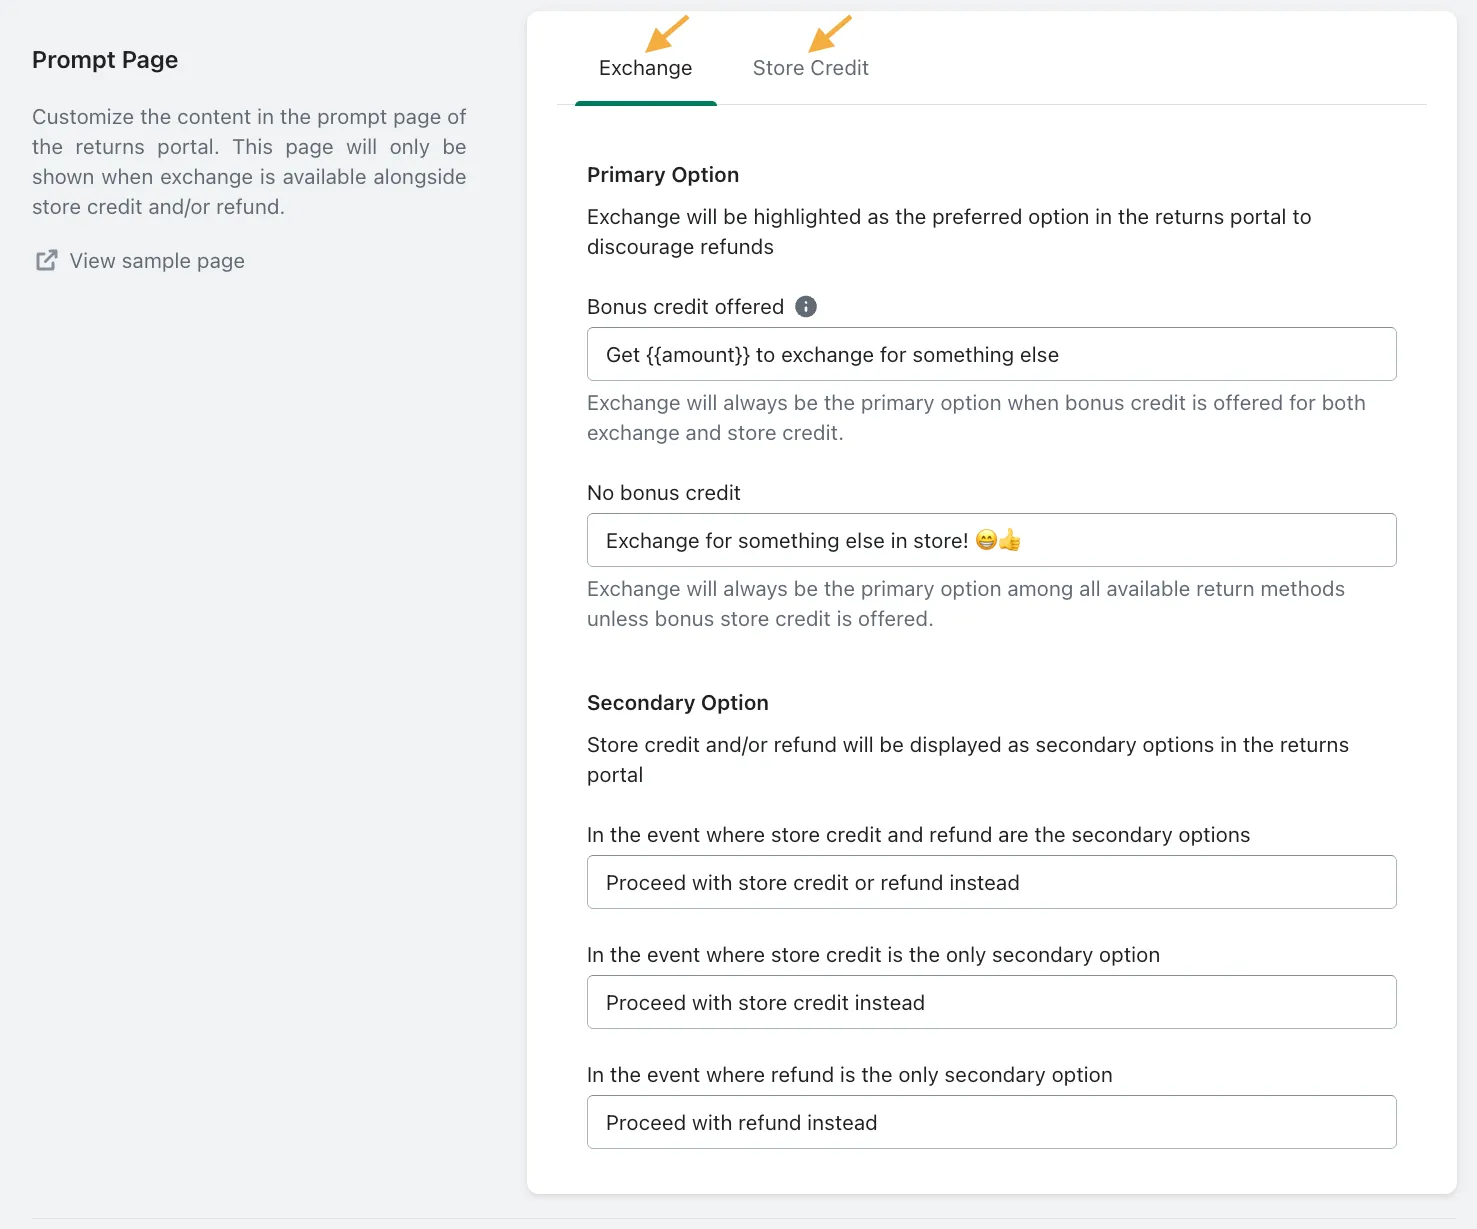
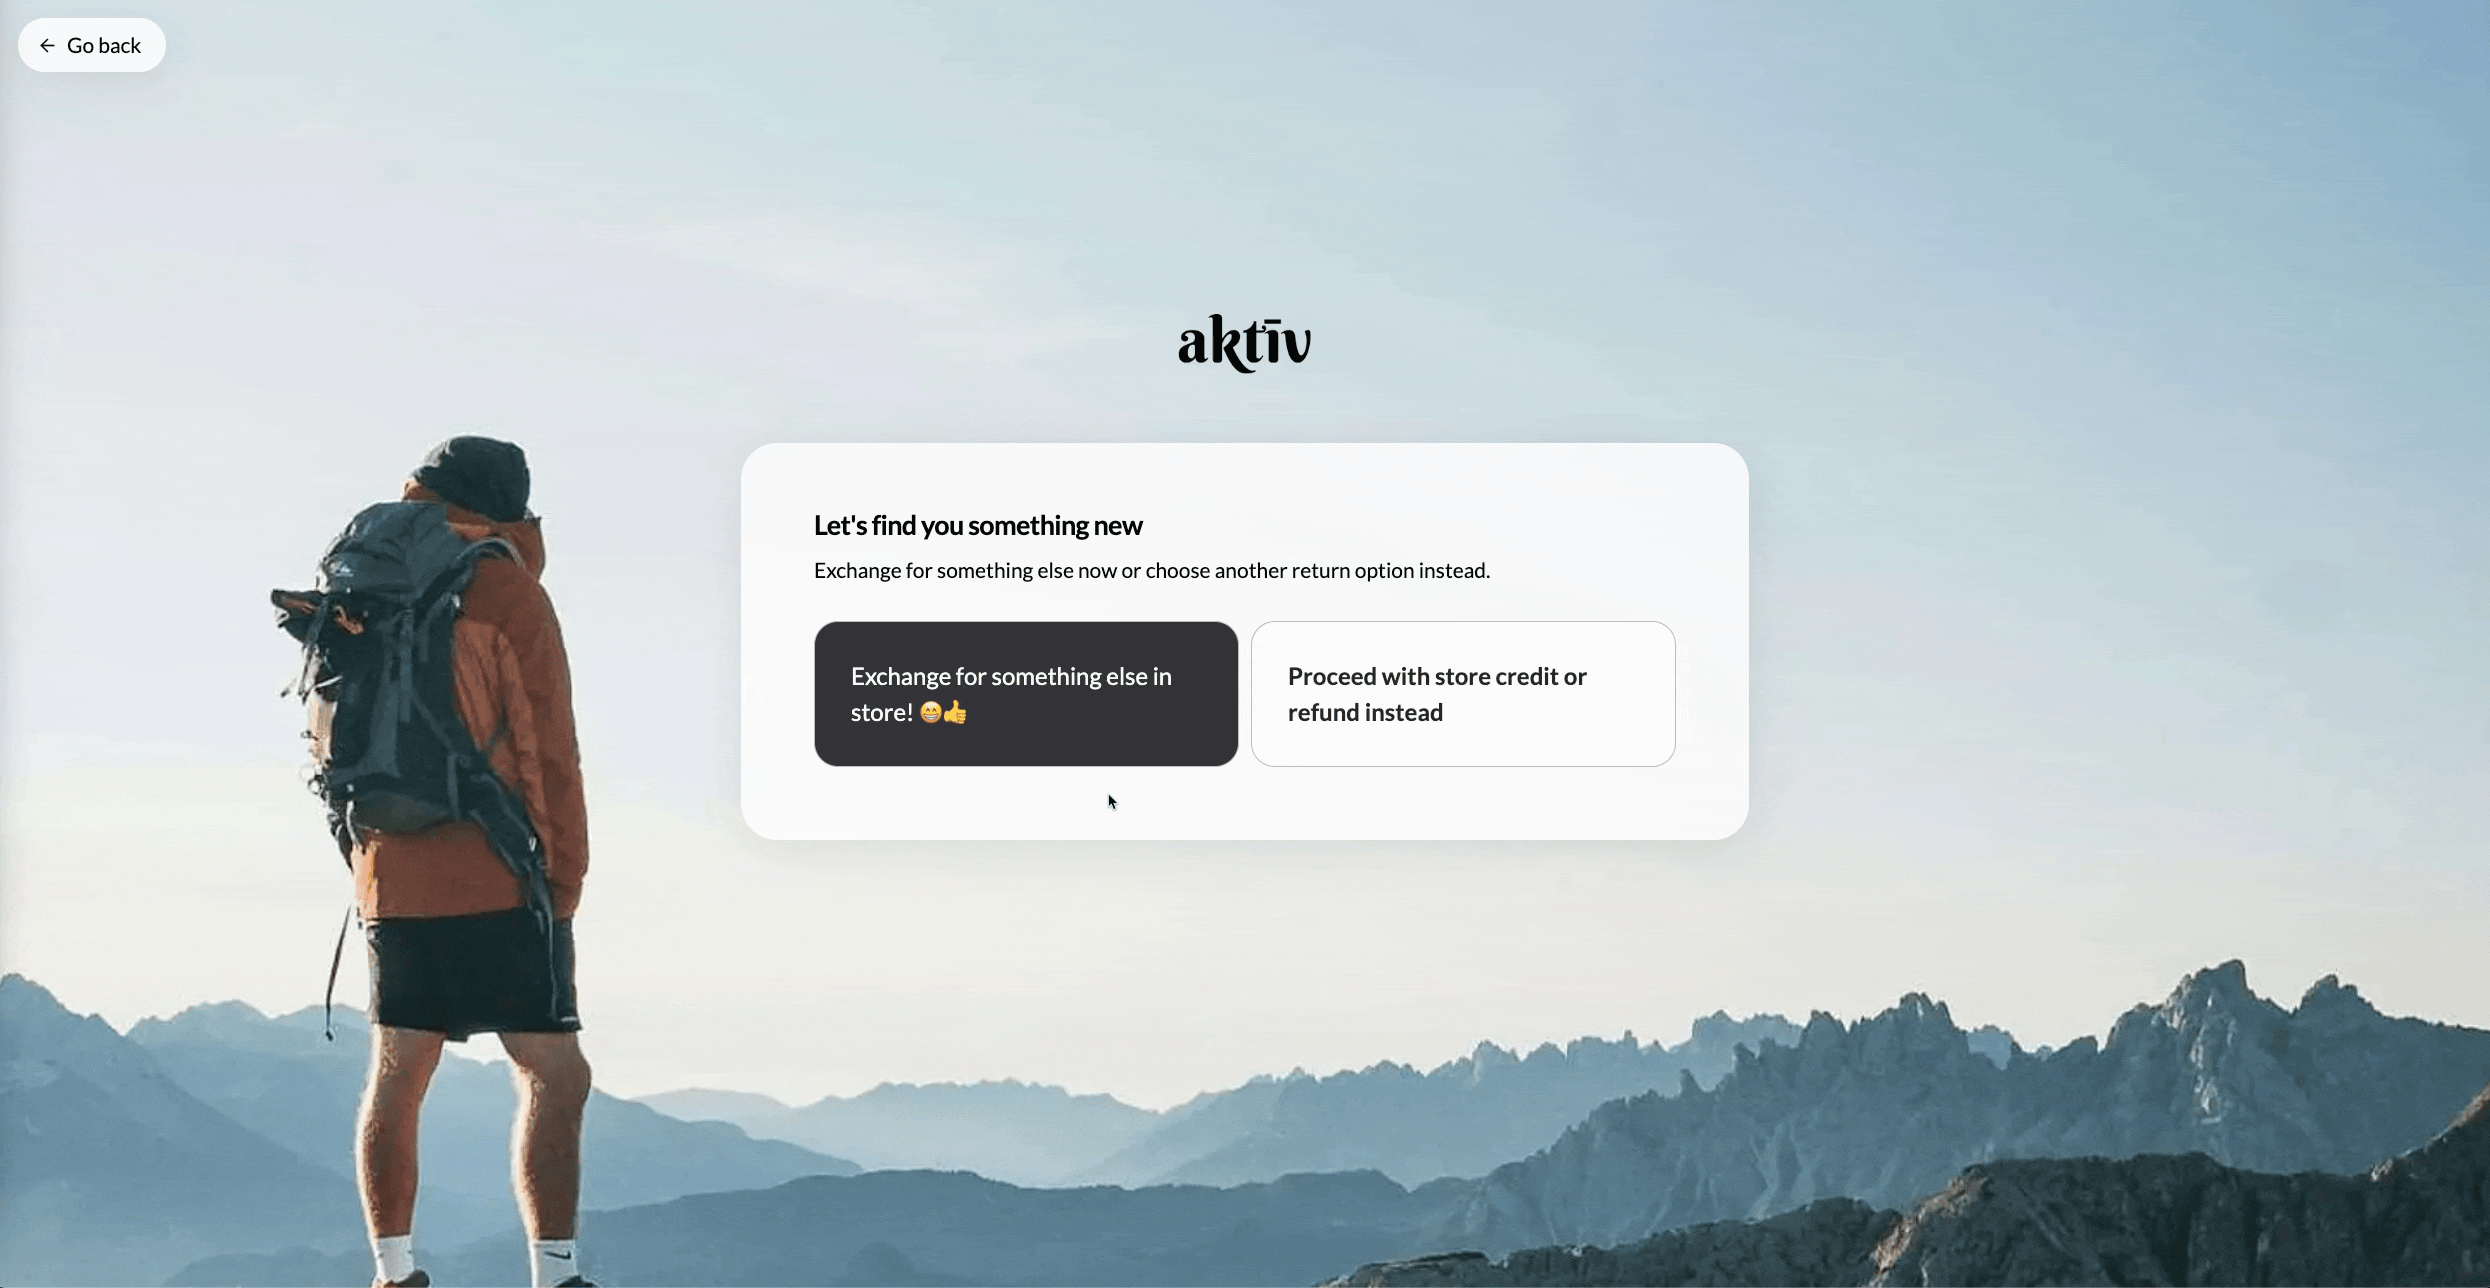
Prompt Page
When a return request can be returned for more than 1 return method, customers are first led to the Prompt Page where they would choose between the primary & secondary return options.

The primary option (left) is the preferred return method that we encourage customers to select over the secondary option (right). By default, exchanges is always set as the primary option over all other return methods.
Note: Refer here on how to make store credit the primary option
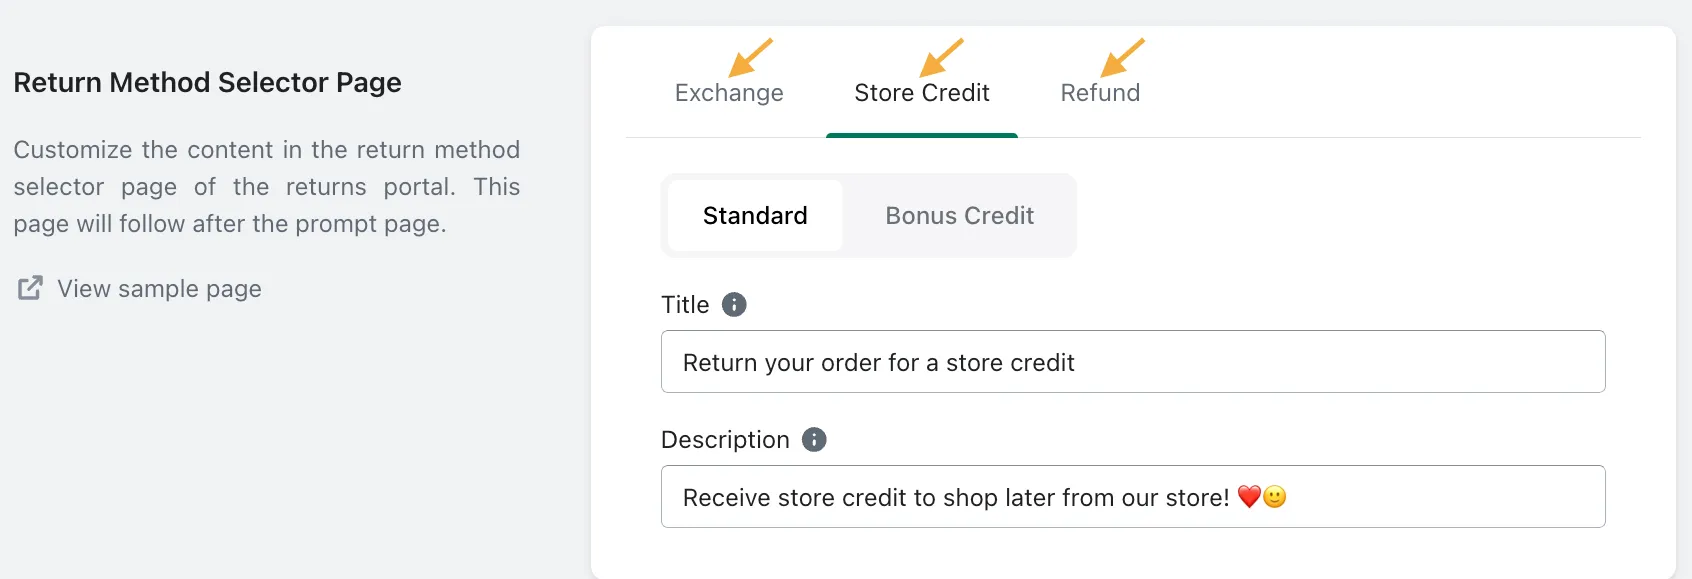
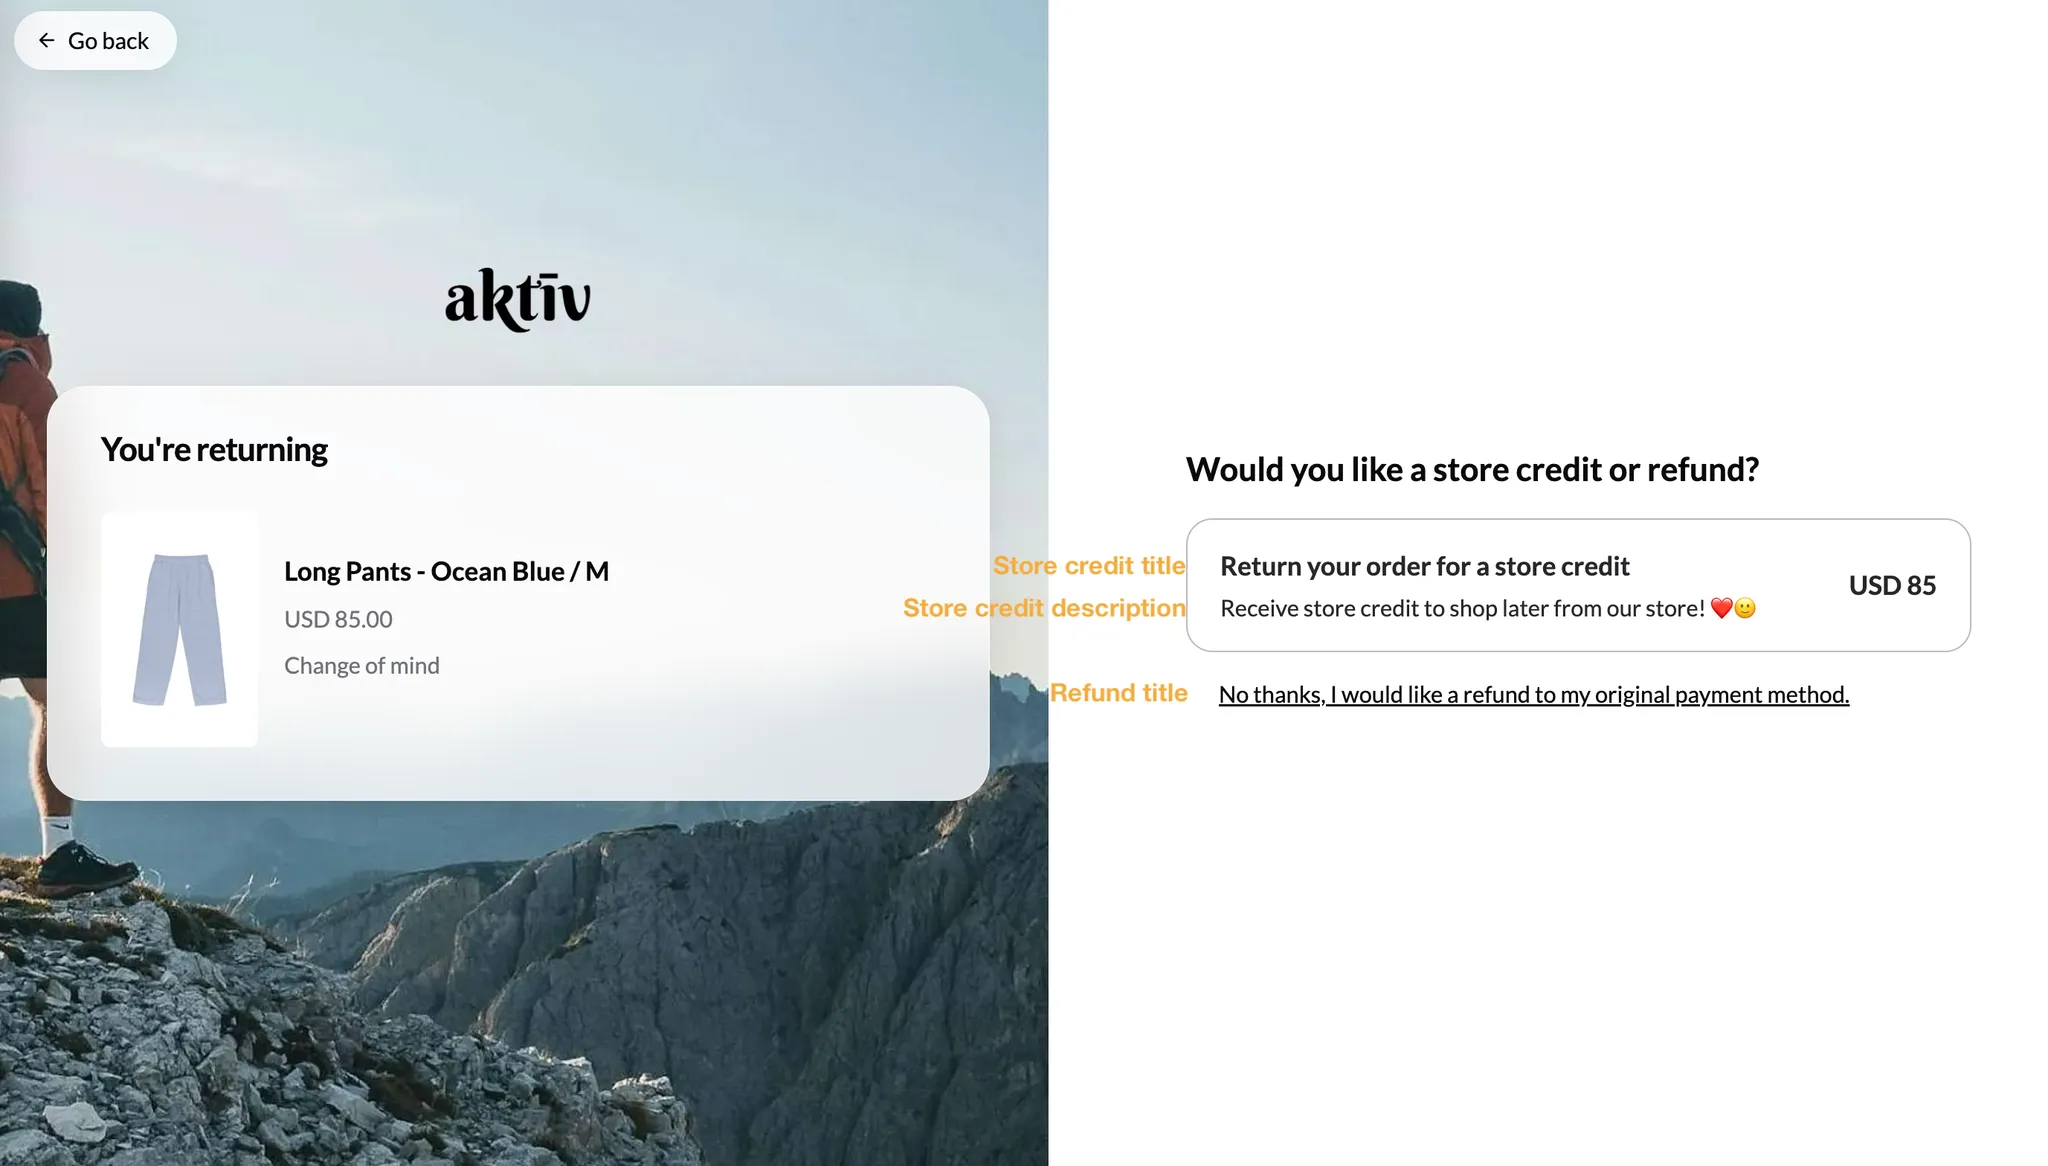
Return Method Selector Page
When the customer selects the secondary option, they’d be led to the Return Method Selector Page.
Here, you may customise the wordings of the title & description of the return methods that appear on the Return Method Selector Page by selecting the respective tab.
Frequently asked questions
How can I make store credit the primary option?
This can be done when Bonus Credit is enabled only for the store credit return method, and not for exchanges. Customers will only be able to select an exchange or refund on the return method selector page.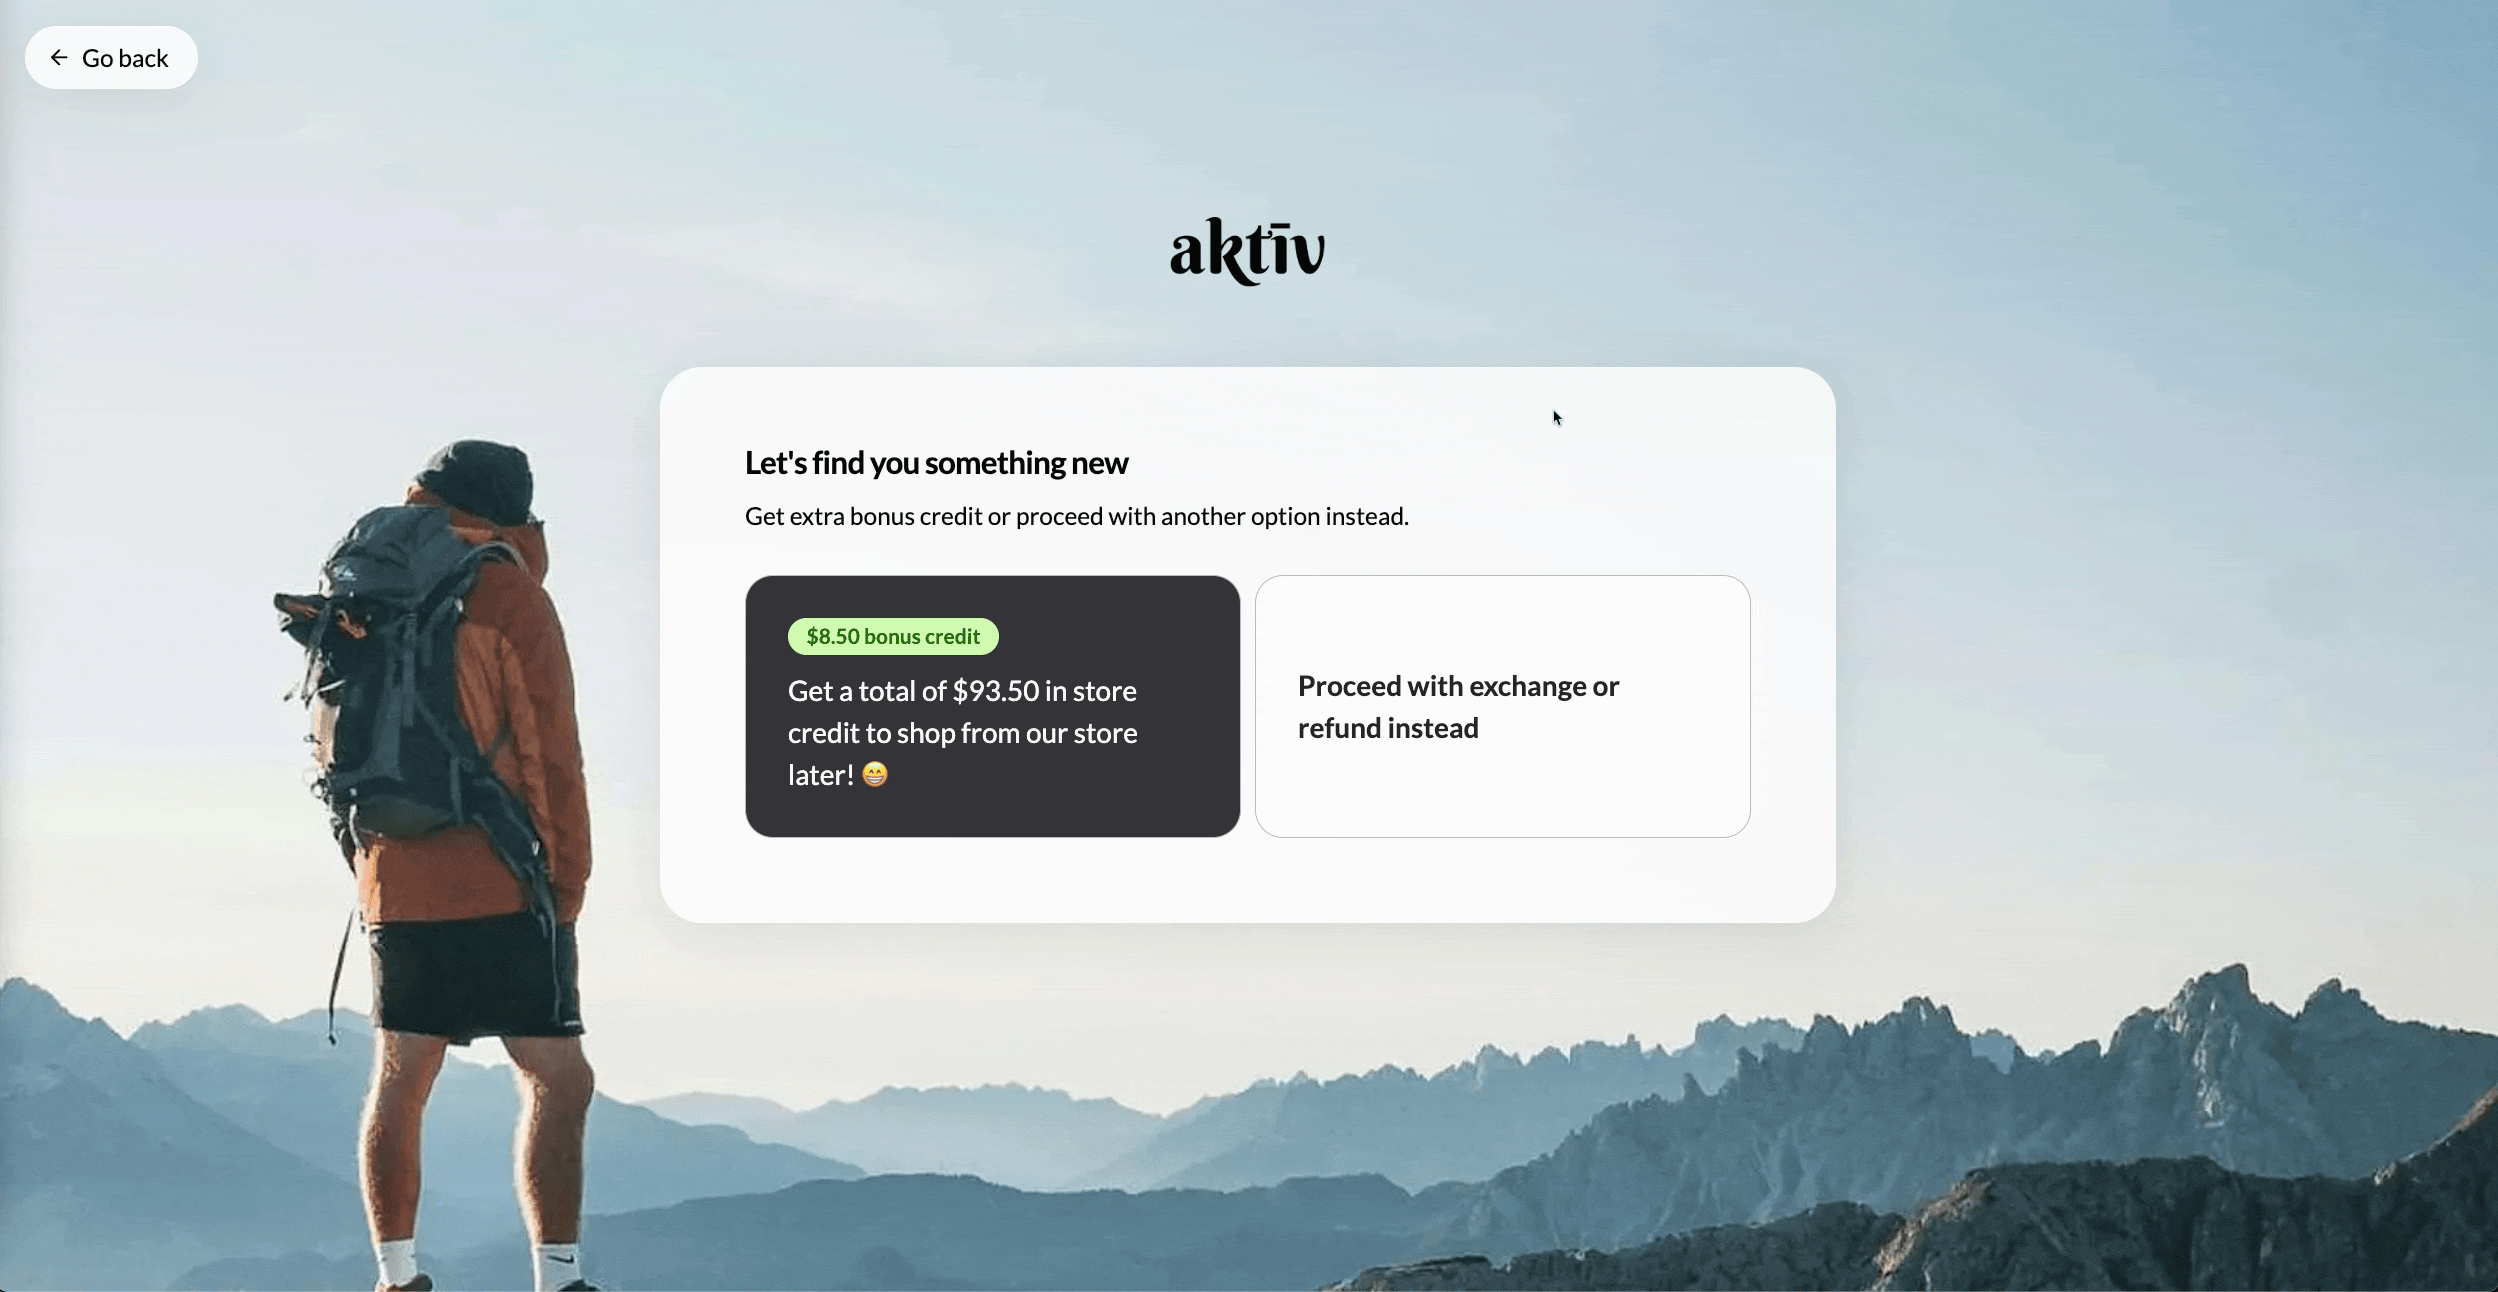
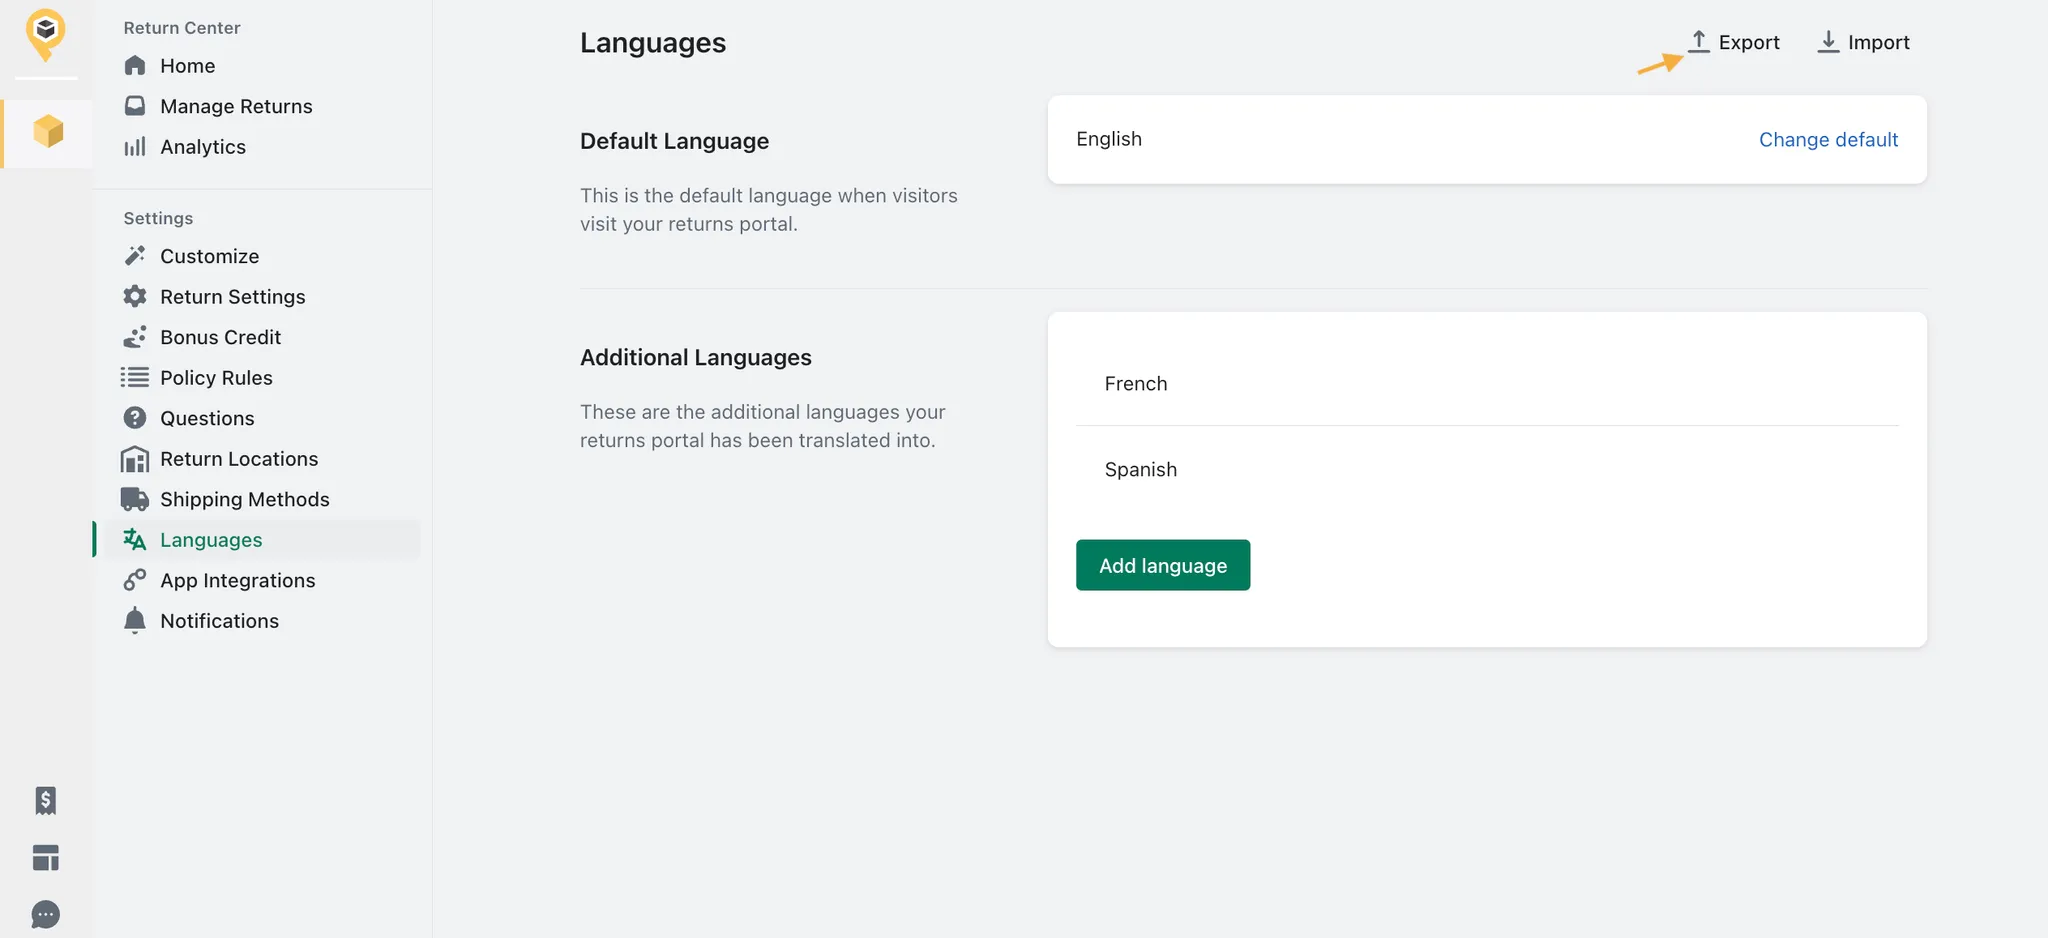
My returns portal is translated to a different language. How can I update the translations?
Customizing the copy through the above method only applies to the English version. If you have more than one language, you can customize the wordings by following the steps below:
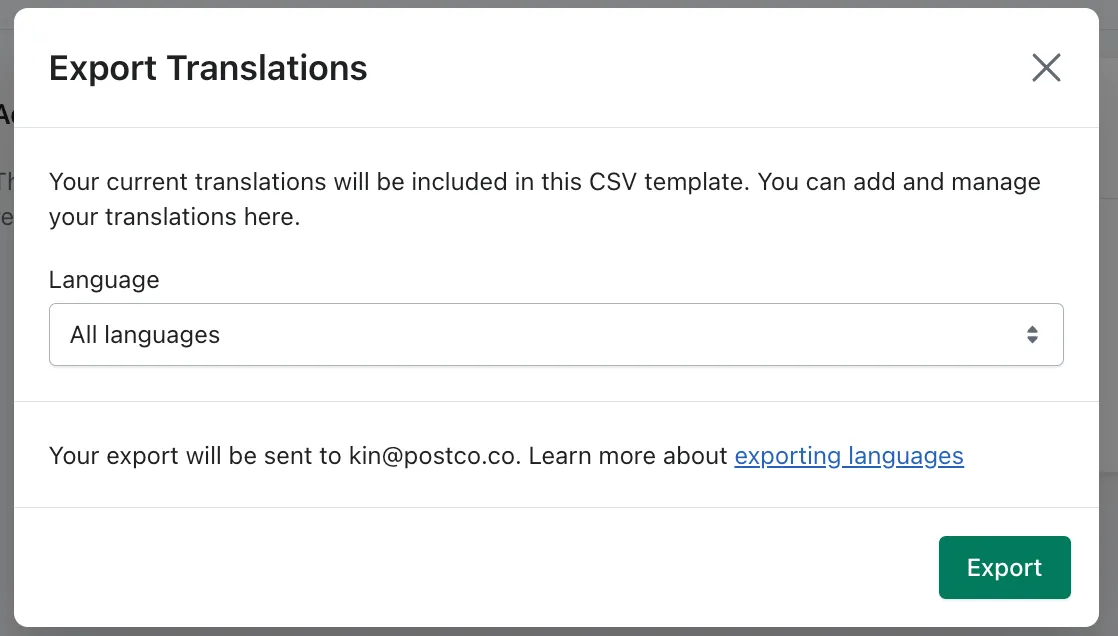
Navigate to the Languages tab in your Retailer Dashboard and:Export the CSV, selecting ‘All languages’
Update the translations according to the columns for each available language:
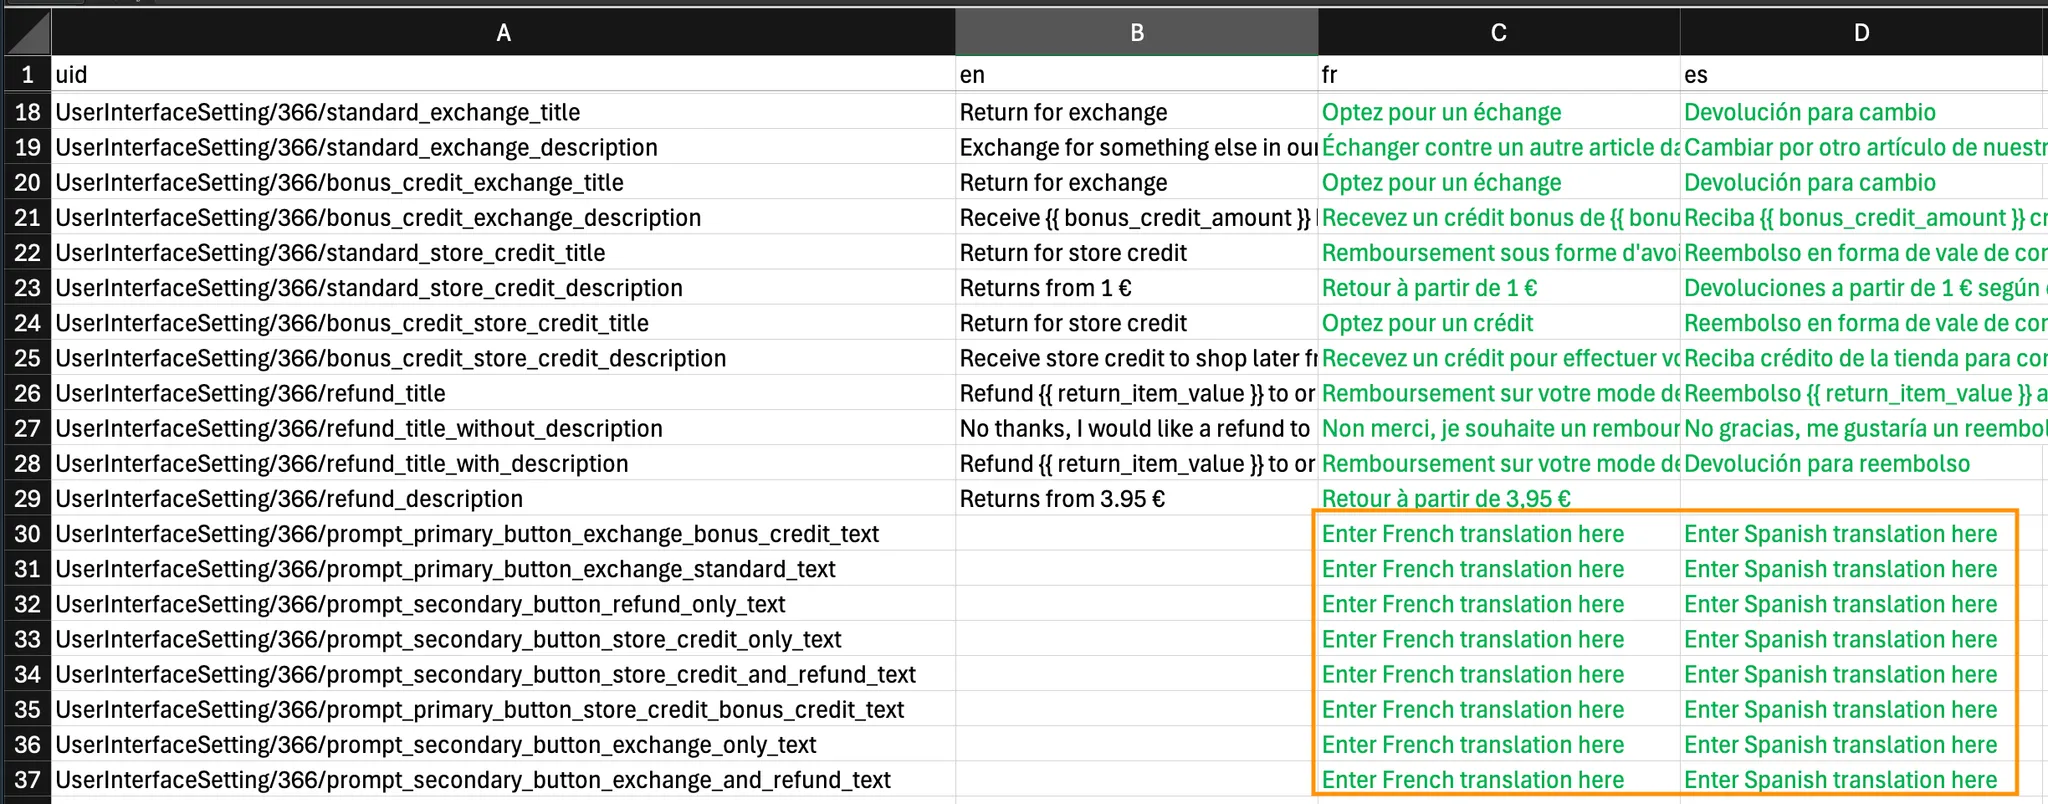
Once you’re done with the above, import the CSV file through the Languages tab and you would see your translations updated!