Setting up same product and advanced exchanges

Edited

Same product exchange

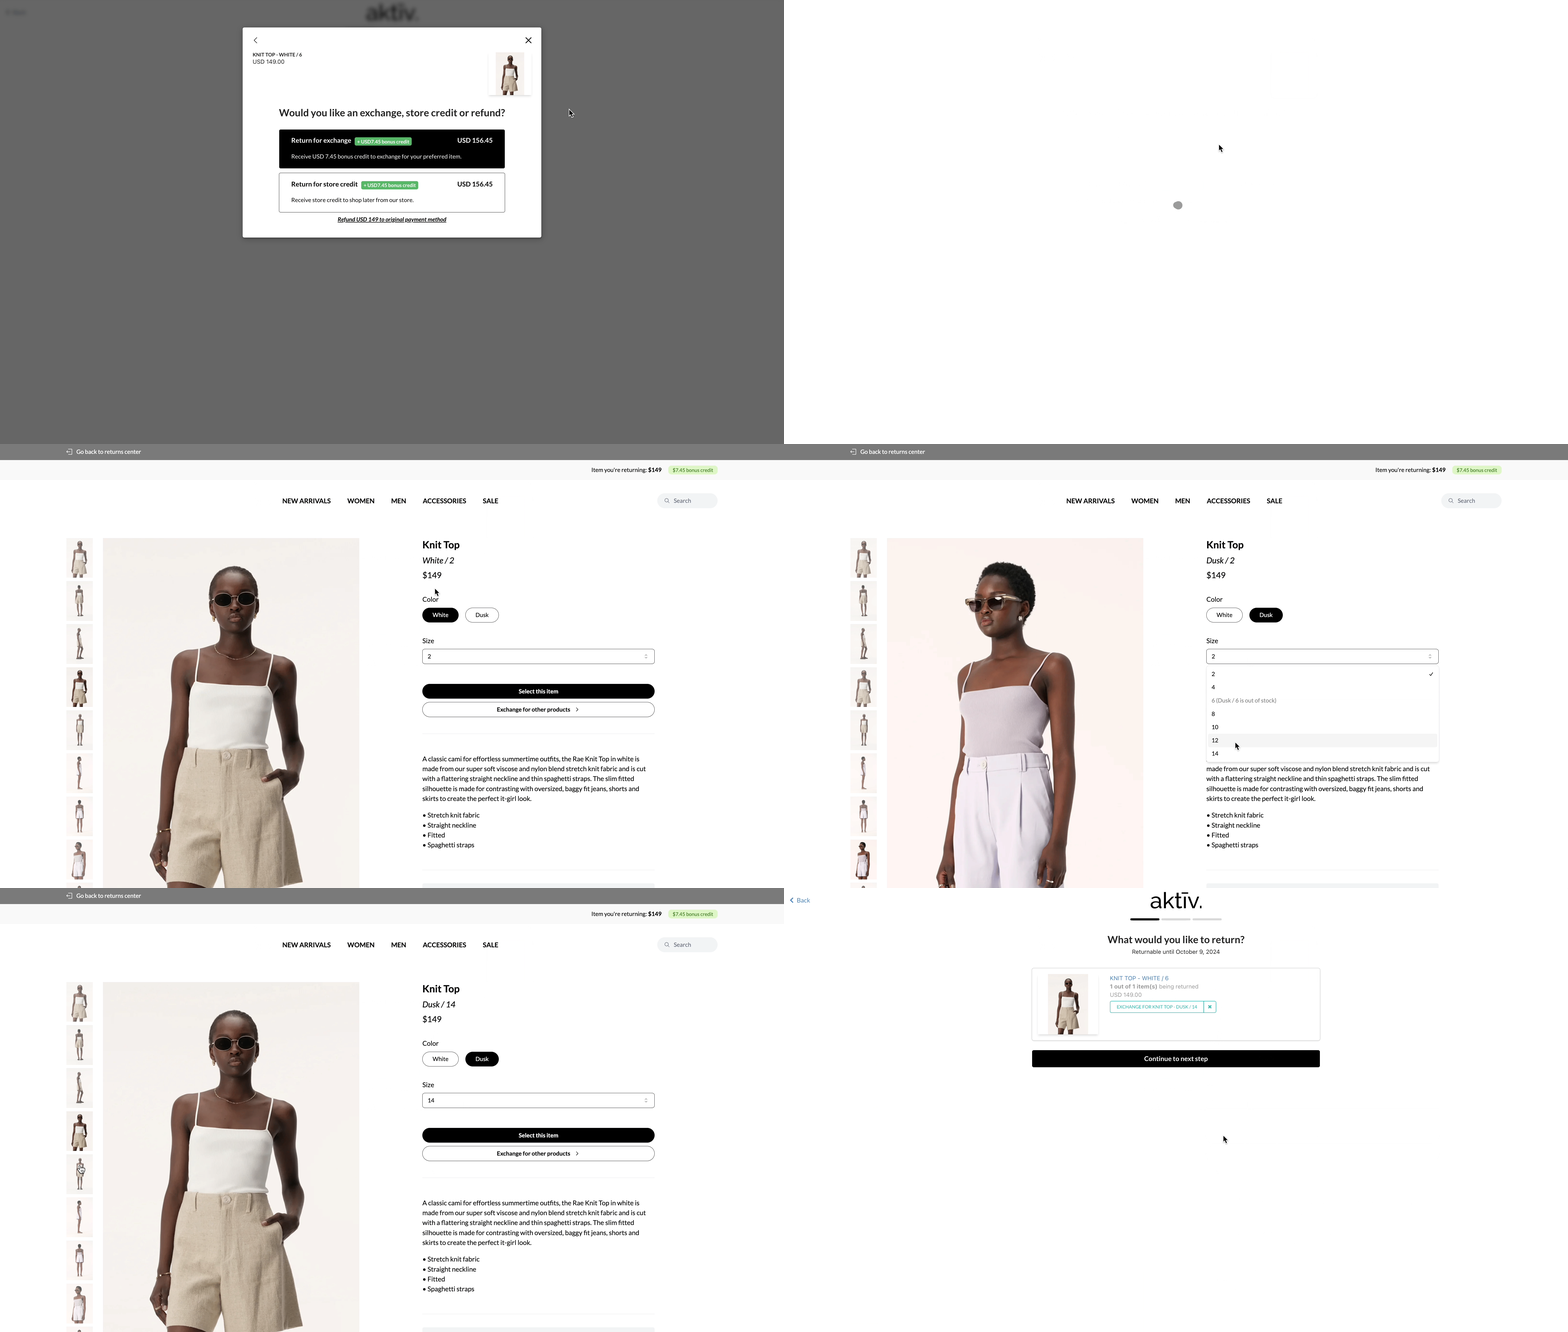
Same Product Exchange allows your customers to swap an item they've purchased for a different variant of the same product. This is particularly useful when customers love the product they've ordered but need a different size, colour, or style to better suit their preferences.

For instance, if a customer purchases a top in size 2 but finds that it doesn’t fit as expected, they can easily exchange it for the same top in a larger size or a different colour.

Setting up same product exchange

To activate the feature, navigate to Return Settings > Exchange. Then, toggle the button to enable it.

Advanced exchange

🚨 For those who have enabled advanced exchange before July 2024, you will need to migrate your old advanced exchange settings to the new one to activate the new exchange flow. Once enabled, the new advanced exchange flow and settings will replace your previous advanced exchange setup. You do not need to disable advanced exchange to migrate your settings.

Advanced Exchange allows your customers to exchange for any items across your entire product catalogue. For example, instead of exchanging for a different size, the customer gets to browse through your entire product catalogue to exchange for a completely different product!

Our exchange flow is designed to emulate an in-store experience for your customers.

  • Shopping menus for customers to shop across your entire product catalogue

  • Sort and filter for customers to easily browse through their favourite products

  • Product recommendations to encourage exchanges and help customers find the right product the second time around!

Setting up advanced exchange settings

1. Install Headless

Headless is a free Shopify App that allows us to create a dedicated storefront for exchanges. After installation, click on create storefront and manage storefront API. Next, edit the storefront API permissions to enable unauthenticated_read_product_inventory (leave everything else unchanged). Once that's done, return to your PostCo dashboard to continue with the Advanced Exchange setup.

2. Configure advanced exchange settings

Here's a checklist to guide you with the setup:

  1. Access Tokens: Copy and paste both the Headless public and private access tokens here. These tokens allow you to use Shopify's Storefront API.

  2. Menu: Add your preferred Shopify menu for easy navigation within the exchange portal. See how you can locate it here.

  3. Product Sorting Default: Choose how products will be sorted by default to help customers browse between products.

  4. Non-Exchangeable Collections: Specify collections that should not be available for exchanges. For instance, exclude sale collections.

  5. Non-Exchangeable Products: Specify products that should not be available for exchanges, such as underwear for hygiene reasons.

3. Customise product filters

It is recommended to have Search & Discovery installed as it allows you to customise various filters for your customers, allowing them to refine their product search based on criteria like price, colour, size, and more.

After installing the app from Shopify App Store, click on Filters and Add filter. Next, select your preferred filter source and save. To sort the filters, simply drag and move the cards around.

Here’s how customers would be able to filter for products in the customer journey:

Once it's set up, just make sure you activate Advanced Exchange and you're good to go! If you plan to test out the new exchange flow, please ensure you use an order with a price assigned to the item.

Frequently asked questions

  1. How to locate my handle menu?

    In your Shopify store, go to Online Store Navigation to select the menu you'd like to display. Copy the handle menu (on the right) and paste it to PostCo exchange settings.

  2. Can I customise my exchange portal menu?

    Yes you can. If you wish to create a different menu for the exchange portal, go to Shopify store and look for Navigation under sales channels. Then, click on add menu to customise your own set of menu to be displayed to the customers.

    * Do note that a menu item must be either a collection or a product.

    Here’s how it would be displayed in the customer journey:

  3. Can I set up advanced exchange without installing Headless?

    Headless is necessary because it allows us to create a dedicated storefront specifically for the exchange flow. By setting up Headless, you can incorporate Shopify menu, allowing your customers to navigate seamlessly, just like in the regular shopping experience.

  4. What if I don't have Search & Discovery?

    Search & Discovery is optional but highly recommended. It helps you to customise product filters, making it simpler for your customers to find exactly what they're looking for during the exchange process.

Advanced Exchange is available on the Pro Plan and above.