Setting up Checkout+
Checkout+ allows customers to pay a small fee at checkout to secure free returns later. This guide walks you through enabling Checkout+ on your store, by adding your Checkout+ markets and configuring the fee shown to customers at checkout.
To get started, simply click into 'Settings' in the Checkout+ section on your PostCo Dashboard and you'd be prompted to update your store's permissions.

Note: If you don’t see the message above, your permissions are already updated and you can proceed with the next steps.
Setting up Checkout+
Step 1: Shopify market requirements for Checkout+
A Shopify market must meet the following conditions to be available for Checkout+:
Status is set to Active & includes only a single country
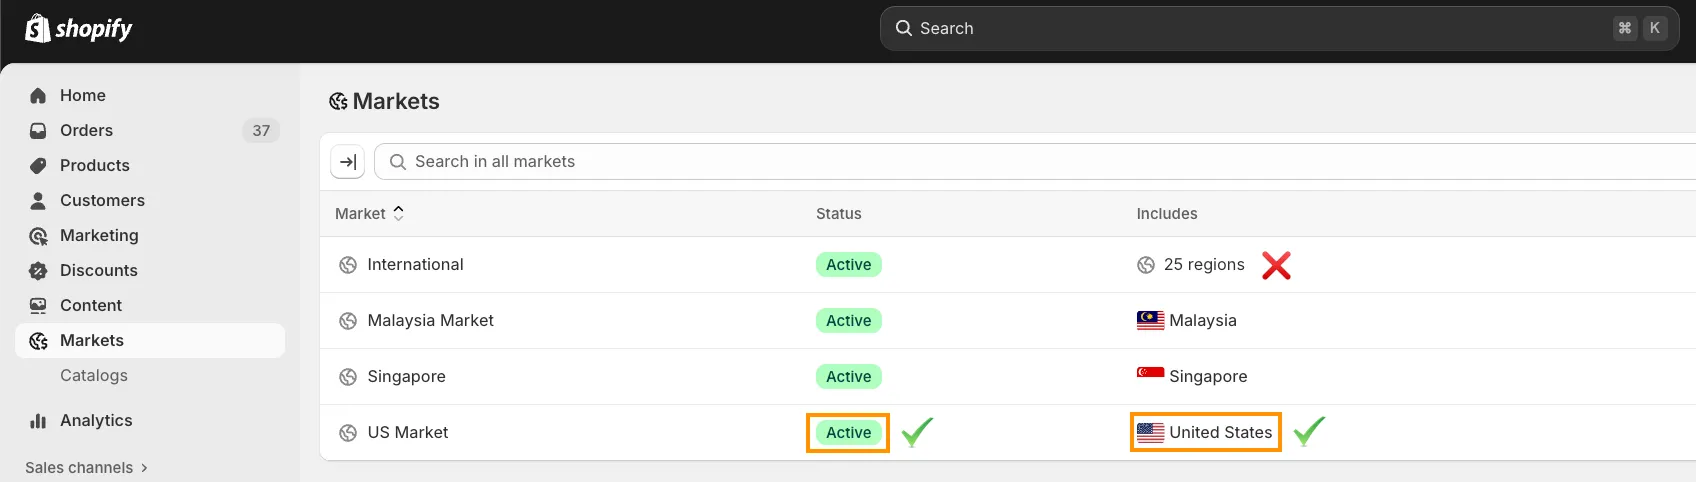
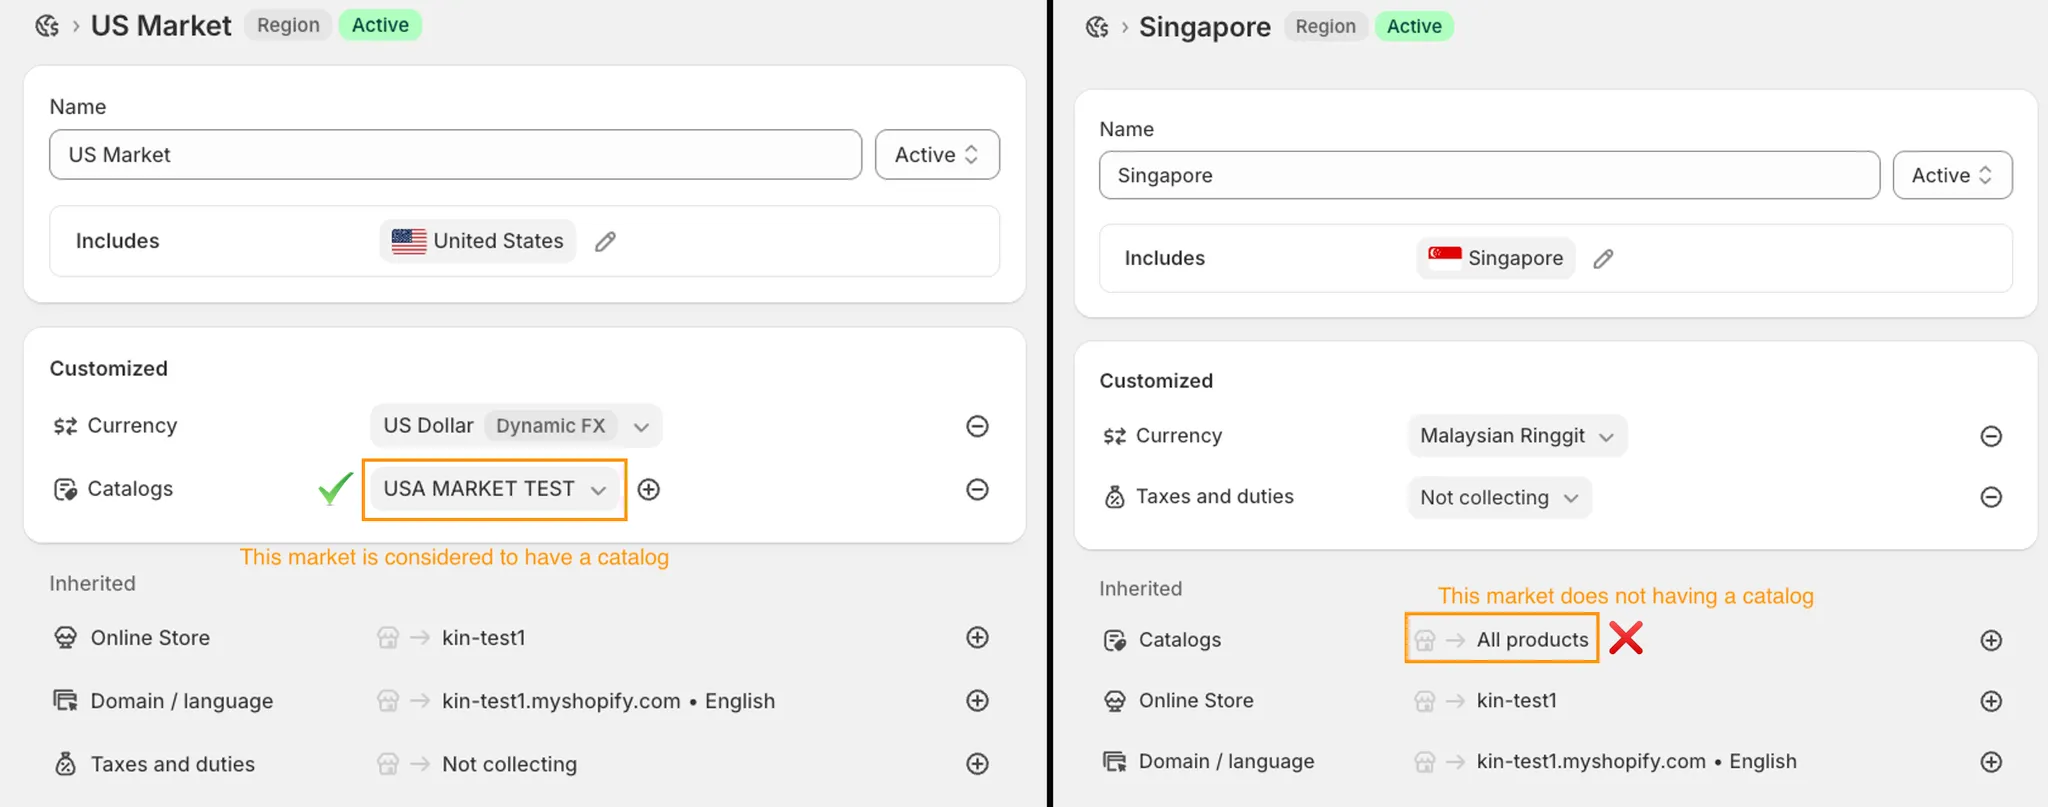
Has a catalog set up for the market
Has a shipping method with a PostCo-supported carrier connected
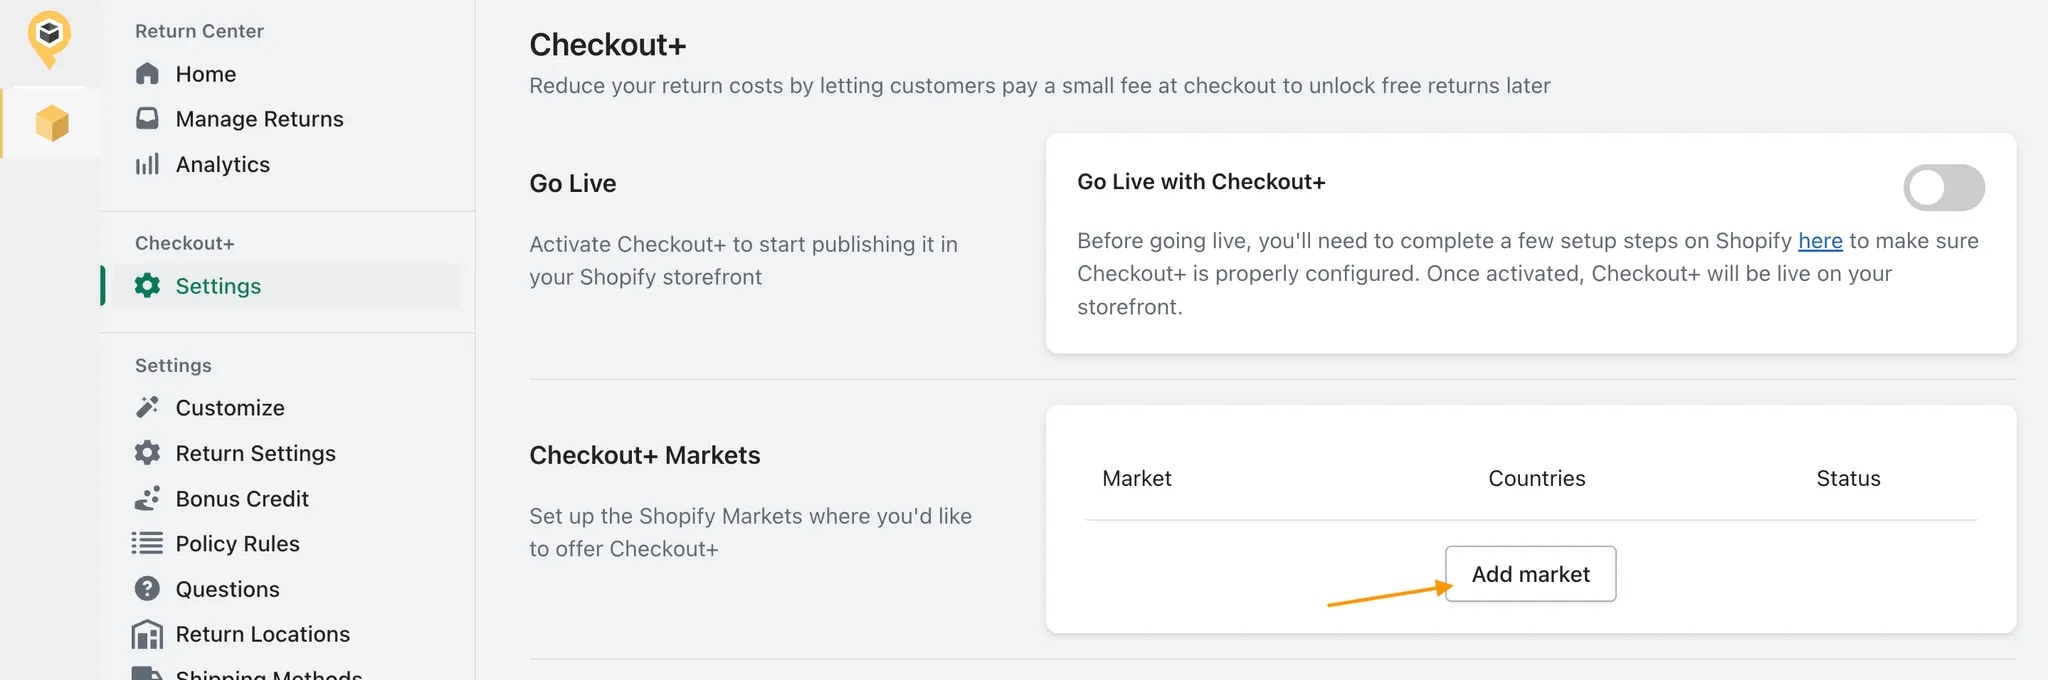
Step 2: Adding a Checkout+ market
To offer Checkout+ in a Shopify Market, simply click on ‘Add Market’ under the Checkout+ Markets section.
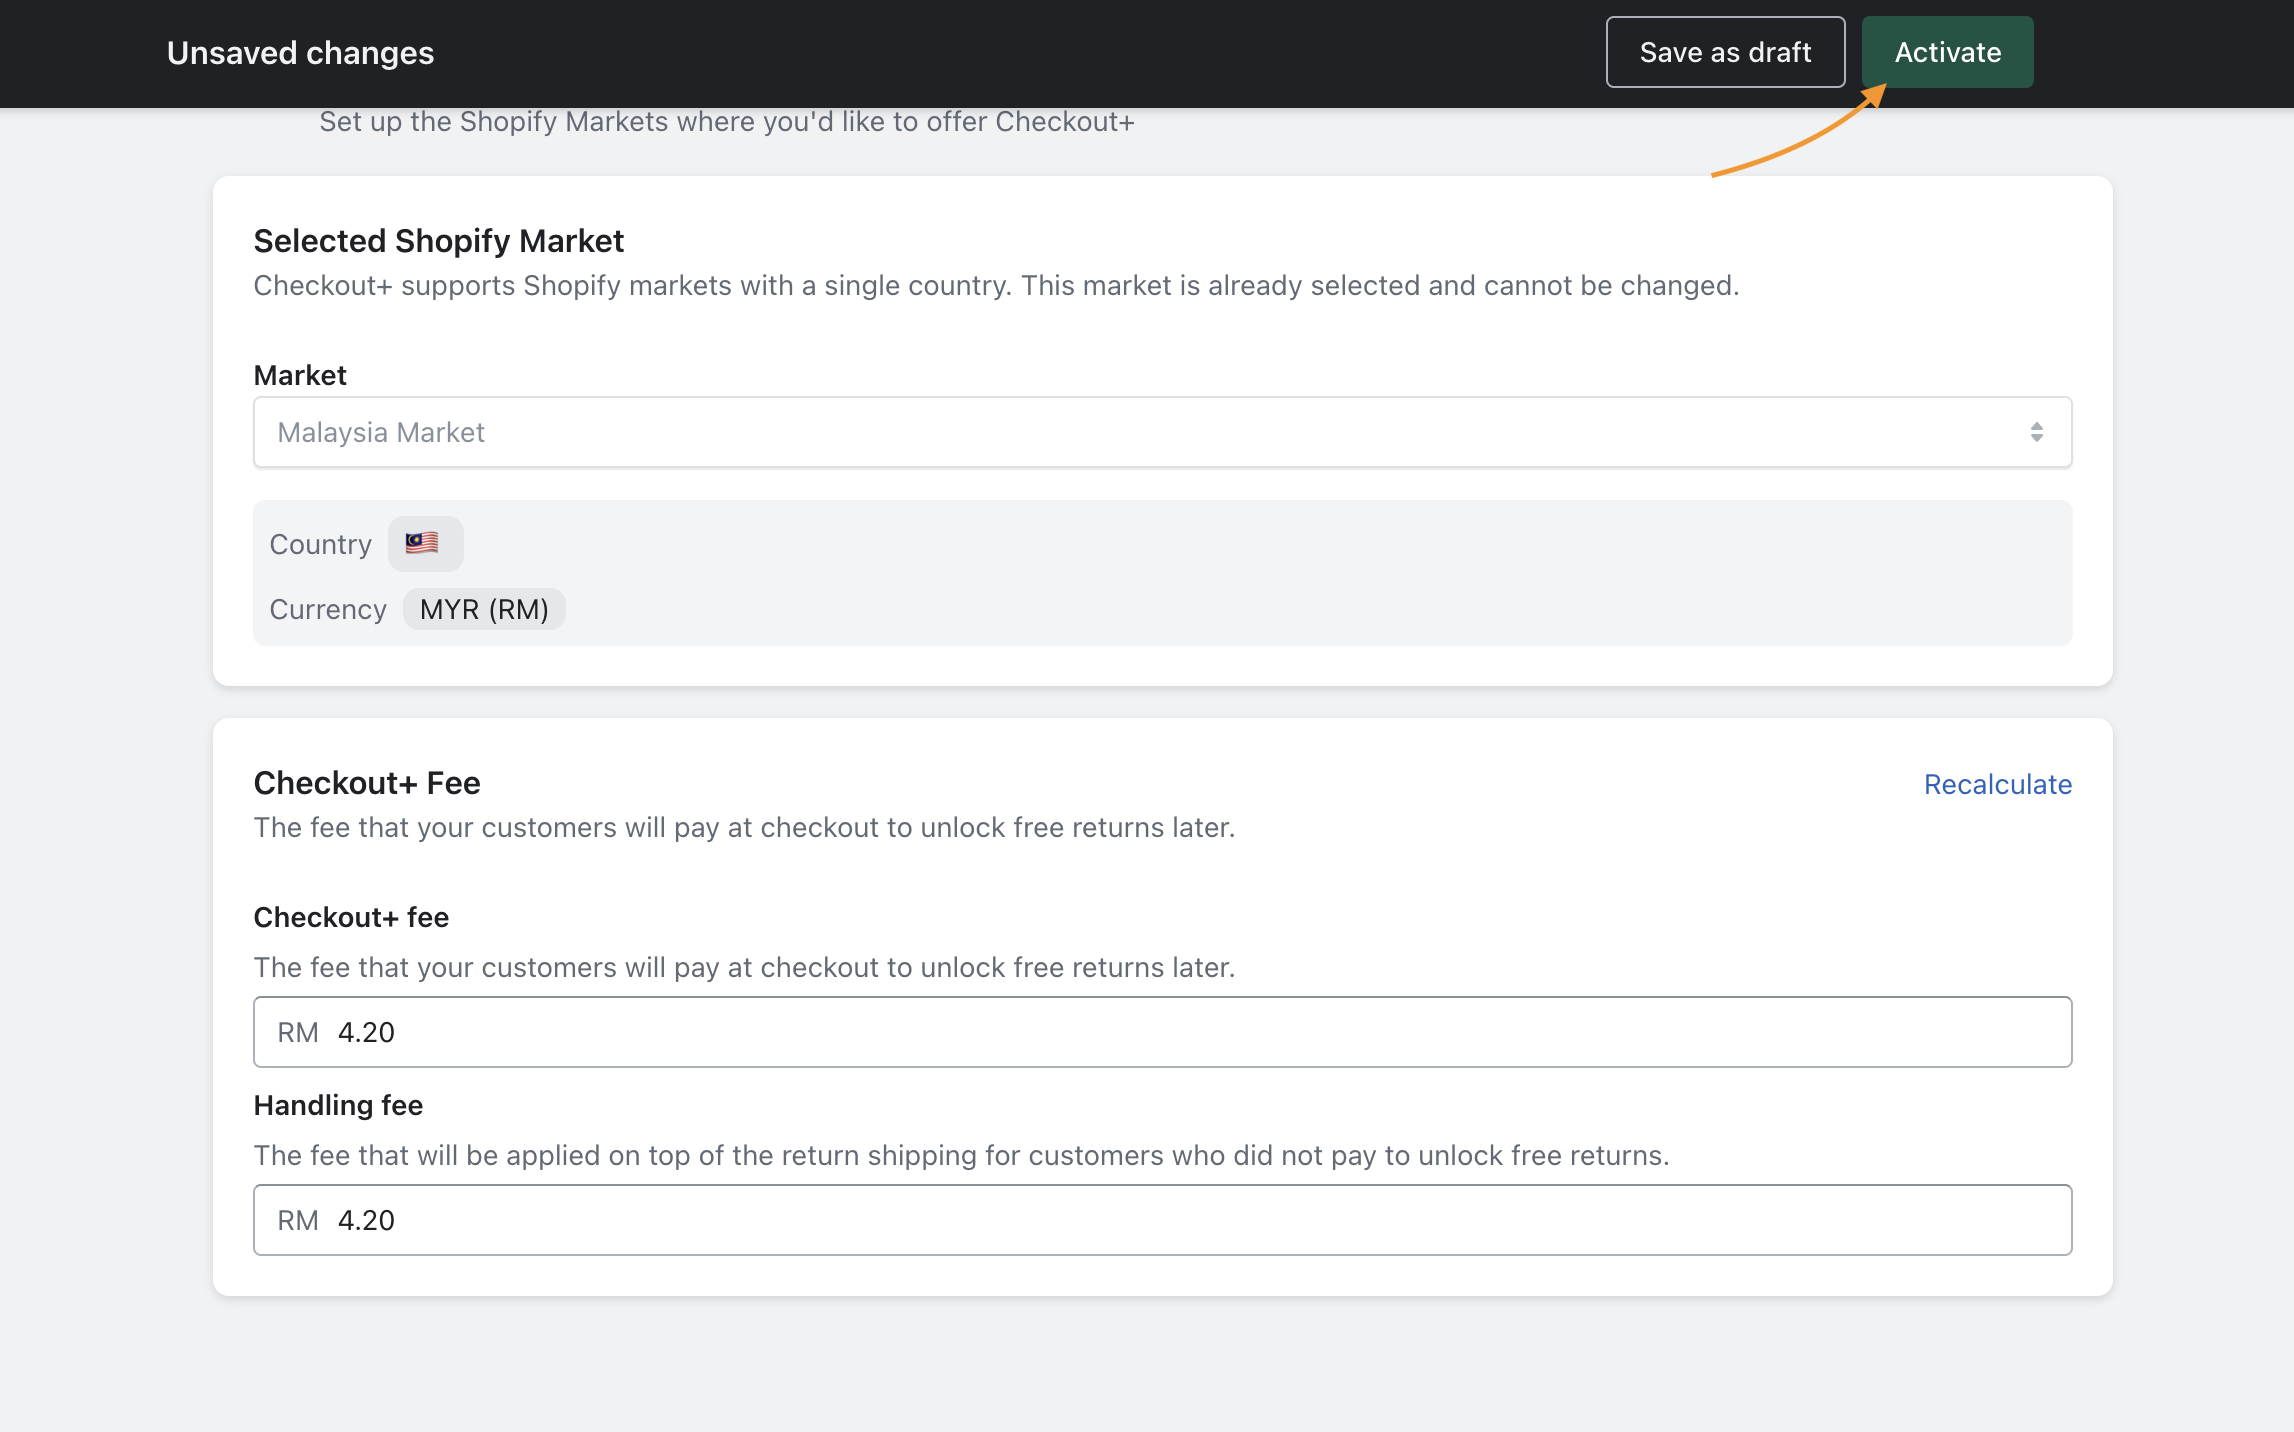
Next, you can enter your estimated annual order volume, annual return volume, and average return label cost, then click 'Calculate'.
You’ll then be able to adjust the expected Checkout+ opt-in rate and the return rate among customers who opt in for Checkout+.
Based on these inputs, not only the system will recommend a Checkout+ fee (paid at checkout) and a handling fee (applied when customers return without opting in), it will also gives you an estimation on the potential gross new revenue.
Note: You can review and adjust these fees anytime later.
After applying the fees above, simply click 'Activate' to add this market for Checkout+.
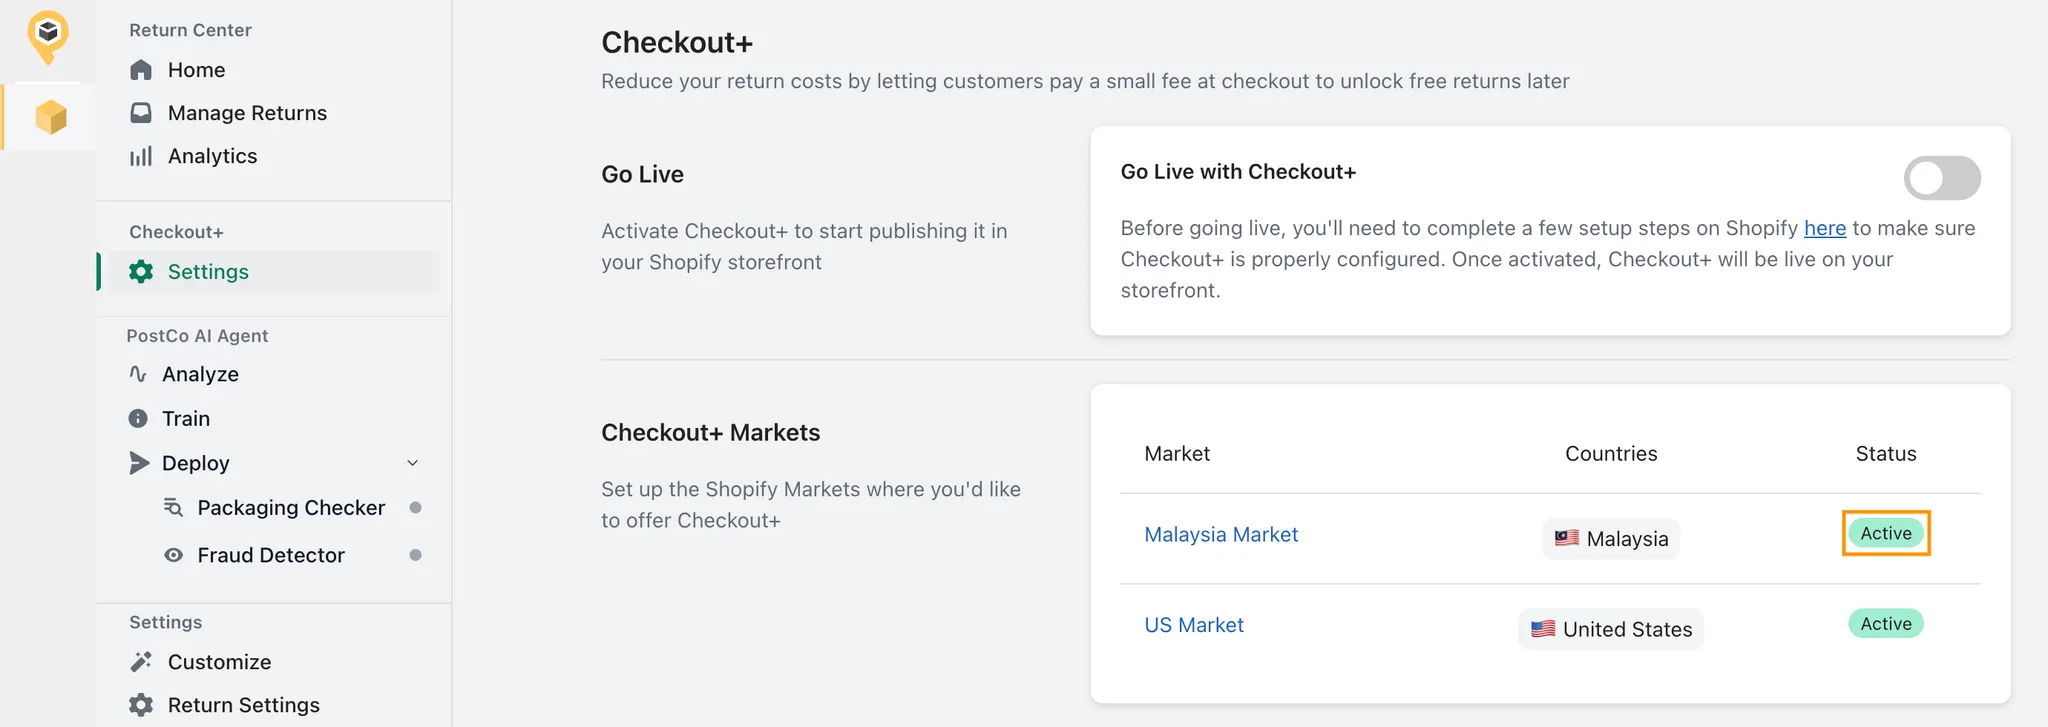
Once a market is successfully added, its status would be updated to ‘Active’ in the Checkout+ Markets section:
Step 3: Configuring Shopify theme & activating Checkout+
Before going live, ensure that Checkout+ is configured in your store by enabling it in the Shopify theme editor.
Here’s a visual guide on how you can do this:
Once that’s done, you may proceed to activate Checkout+ below:
Frequently asked questions
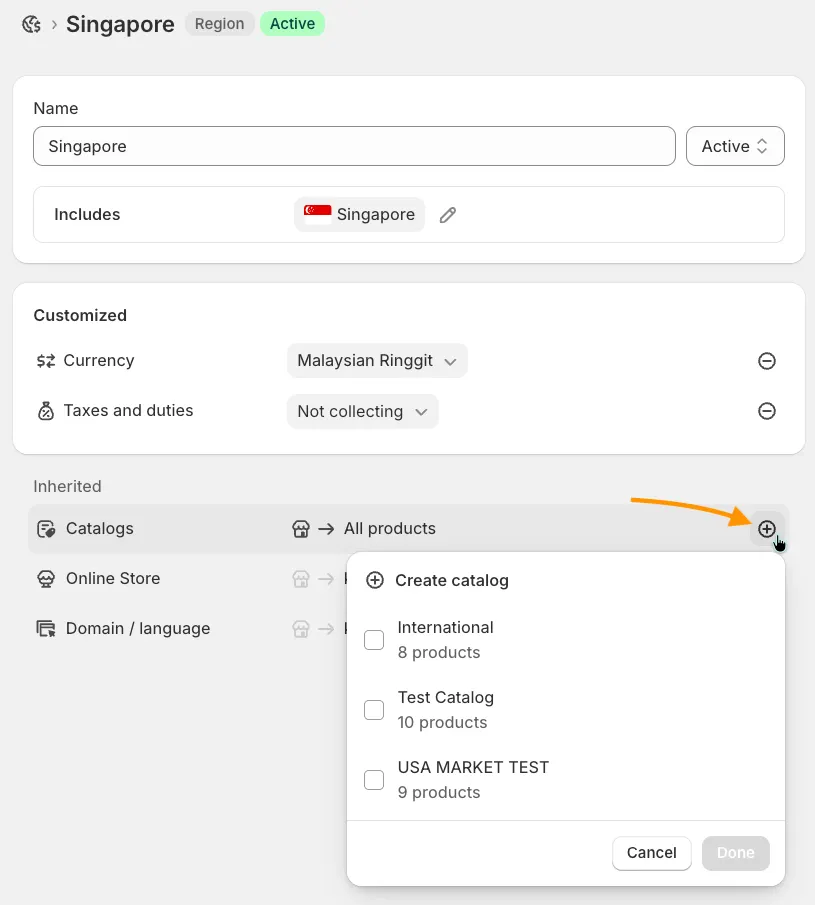
How can I add a catalog to a selected market?
In the selected Shopify market, simply click on the plus icon under Catalogs to add a catalog.